This backyard remodel started because we wanted a hot tub. But unfortunately, I do not LOVE the look of an above ground hot tub.
So I got to work designing a space that looked stunning, while including one. I also wanted to add in a fire pit and an outdoor dining table.
Here are a few before shots of the space. Nothing special and lots of grass!
The first thing I did was sketch a bird’s eye view of my plan. This way my landscaper and I were on the same page!
Since this was a semi large area, I needed to come up with something for the ground that would not break the bank. I’ve always loved the look and sound of pea stone and it is relatively inexpensive ($50 a yard). So I decided to go that route!! The first step was to remove the grass + existing stone and the landscapers were able to do that in about 2 hours with a skid steer.
I did not want to pour a concrete slab for the hot tub so I researched alternatives. I read that a very flat gravel patch is actually wonderful for hot tubs. So we did that!
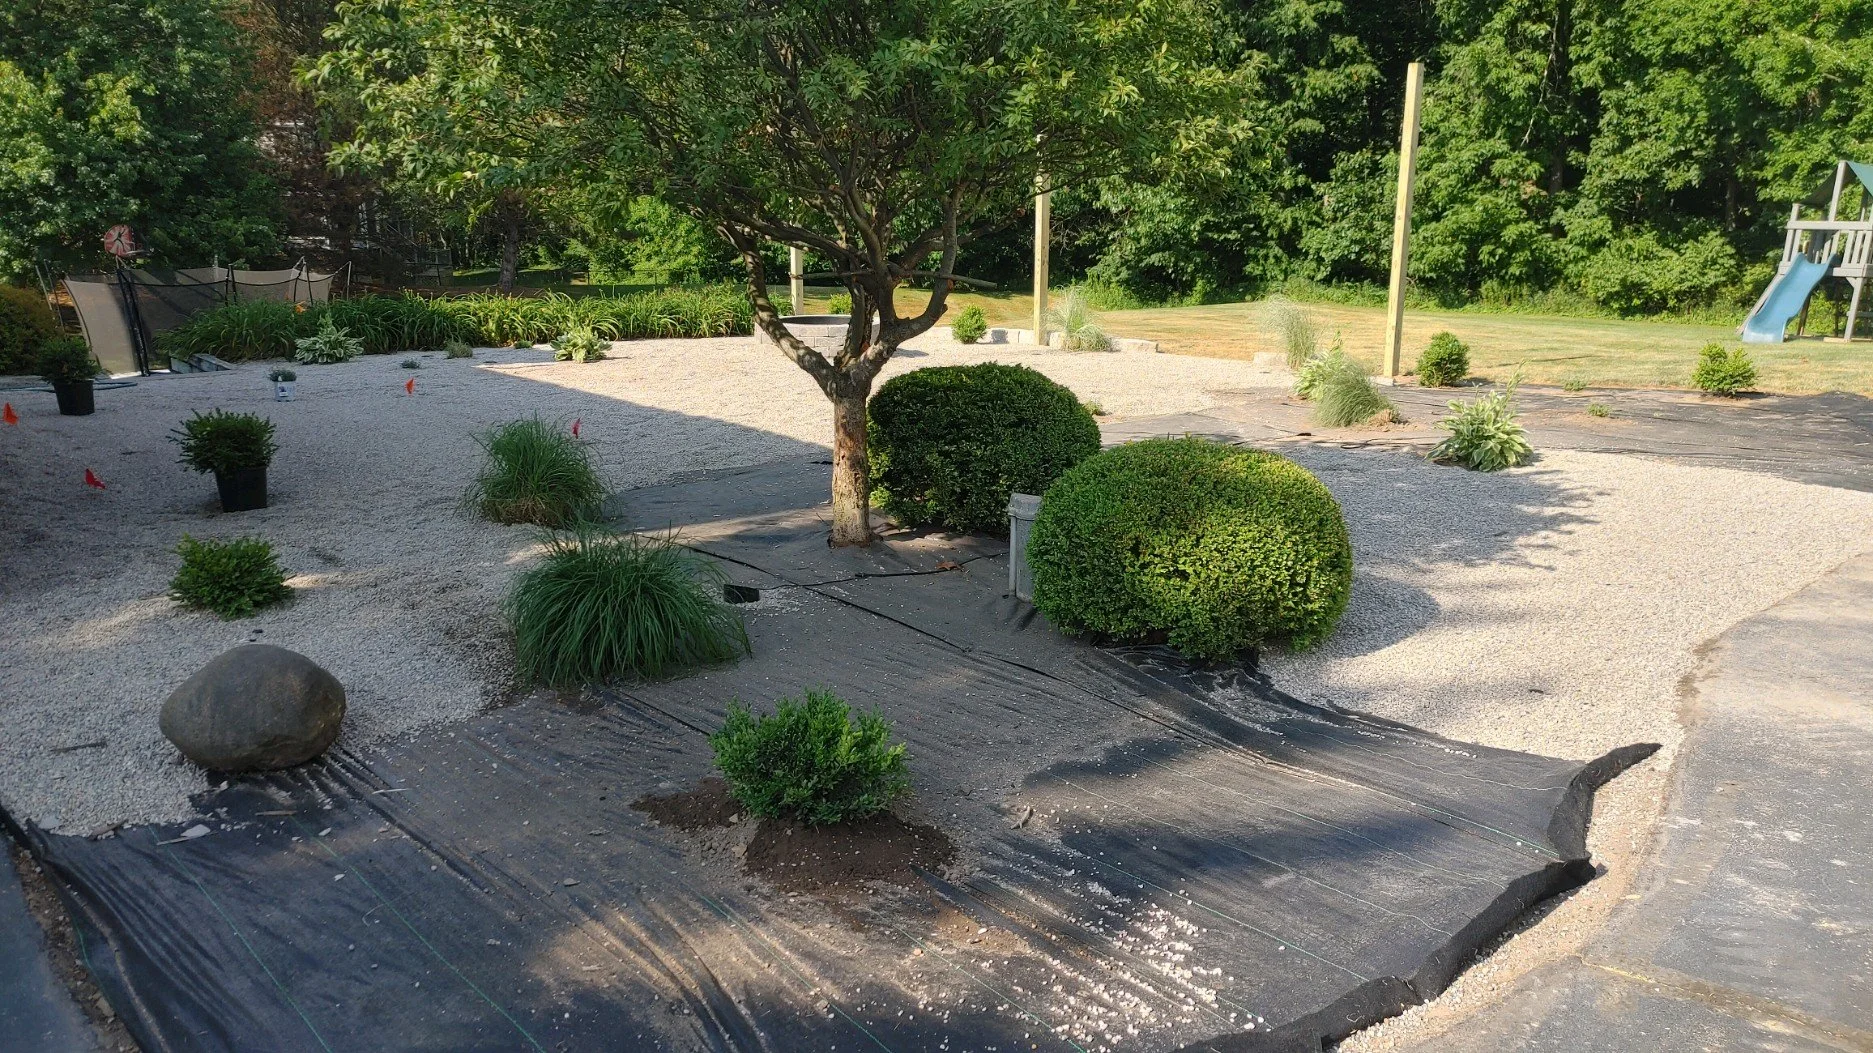
Next they layed a ground cover, to prevent weeds and plants from coming up through the pea stones.
I wanted plants throughout the patio, so we relocated some of the existing plants and brought in a few new ones.
I wanted to line the edge of the patio with posts so that I could hang twinkle lights and separate the patio from the rest of the yard. :)
I also edged the patio with a large Chilton Limestone. This was to keep the pea stone in and the grass out. Plus it added a new type of texture and level to the space. These pictures don’t show it, but we added some rocks from our collection to the border where the patio enters the lawn. That has kept all of the pea stones in place :)
Since I was planning on hanging THESE string lights, we had an electrician install a plug at the top of the post, along with a light switch in the middle. We also added another plug at the bottom in case we needed it for something in the future.
I bought two different Adirondack chairs made out of polywood. This stuff is amazing because it is super durable and does not require sealing or any maintenance like typical wood chairs. (Left is the larger one, linked HERE. Right is the smaller one Linked HERE.). My husband, who is larger, liked the left and I, more petite, liked the right. Since they were both pretty close in color, figured I would do 4 of each. Its always nice to have options when different sized guests come over to visit :). These chairs have held up amazingly in all of the elements!
My husband was worried that having two different styles of chairs would look wonky, but it looks great! I love the umbrellas from Pottery Barn and have THIS umbrella in a 9ft at the dining table, as well as the Portofino umbrella in a 10ft by the fire pit.
And the unique baluster side table + umbrella stand is linked HERE.
The hot tub was delivered (from MasterSpas) and it was so exciting!! The star of the show had arrived!! We placed the hot tub/spa about 3-4ft from the wall. I was planning on doing something on this wall and we needed room for the hot tub cover. Usually hot tubs/spas are sold with ‘arms’ that lift the cover up when you want to swim. But the problem with that design is that while you are in your spa relaxing all you can see is…. an ugly hot tub cover. So we skipped the arms and planned on simply setting the cover on the ground between the spa and the wall when we used it.
This was our first night using the patio and it was wonderful!! We roasted marshmallows, we star gazed in between the clouds and we just had so much fun! It was wonderful finally using a space we had never used before when it was just grass. *When we do big fires, I remove the umbrella and set it away from the fire ;)
Ok, a few things in the photo that I did not touch on! First, we made walkways using Carolina Rose flagstone. This flagstone was one of the more expensive item in this patio remodel, so we really only used it where necessary. We created walkways from doors to the hot tub, to the backyard, to the fire pit and so on. I definitely recommend having some sort of a flat surface to walk on with pea stone. We also set flagstone at each Adirondack chair so people have place to rest feet while sitting. Also, I planned on painting the posts the same color as the house, we just hadn’t done it yet. *Notice I previously painted the swingset the same gray color as our house ;)
You may see a few lights shining up from the ground! I planned for in-ground lighting in between plants and in strategic areas. I wanted the lights to actually be nestled in the ground, this way I did not have to worry about anyone tripping over them, breaking them or having to see them in the day time. I was torn between doing in ground light or doing just string lights. I ended up doing both and I am VERY glad I did! The landscape lights have an eye sensor and turn on automatically every night. They provide just enough ambiance lighting, perfect for relaxing in the spa. The string lights have to be turned on when we want to use them and they are pretty bright. Great for when we have people over and evening dinners outside.
Here is a closer peek at those in-ground landscape lights.
This was the day we had the posts painted the same color as our house.
While it is a pea stone patio, I made sure to still include a lot of greenery!
Remember I had plans for behind the hot tub…
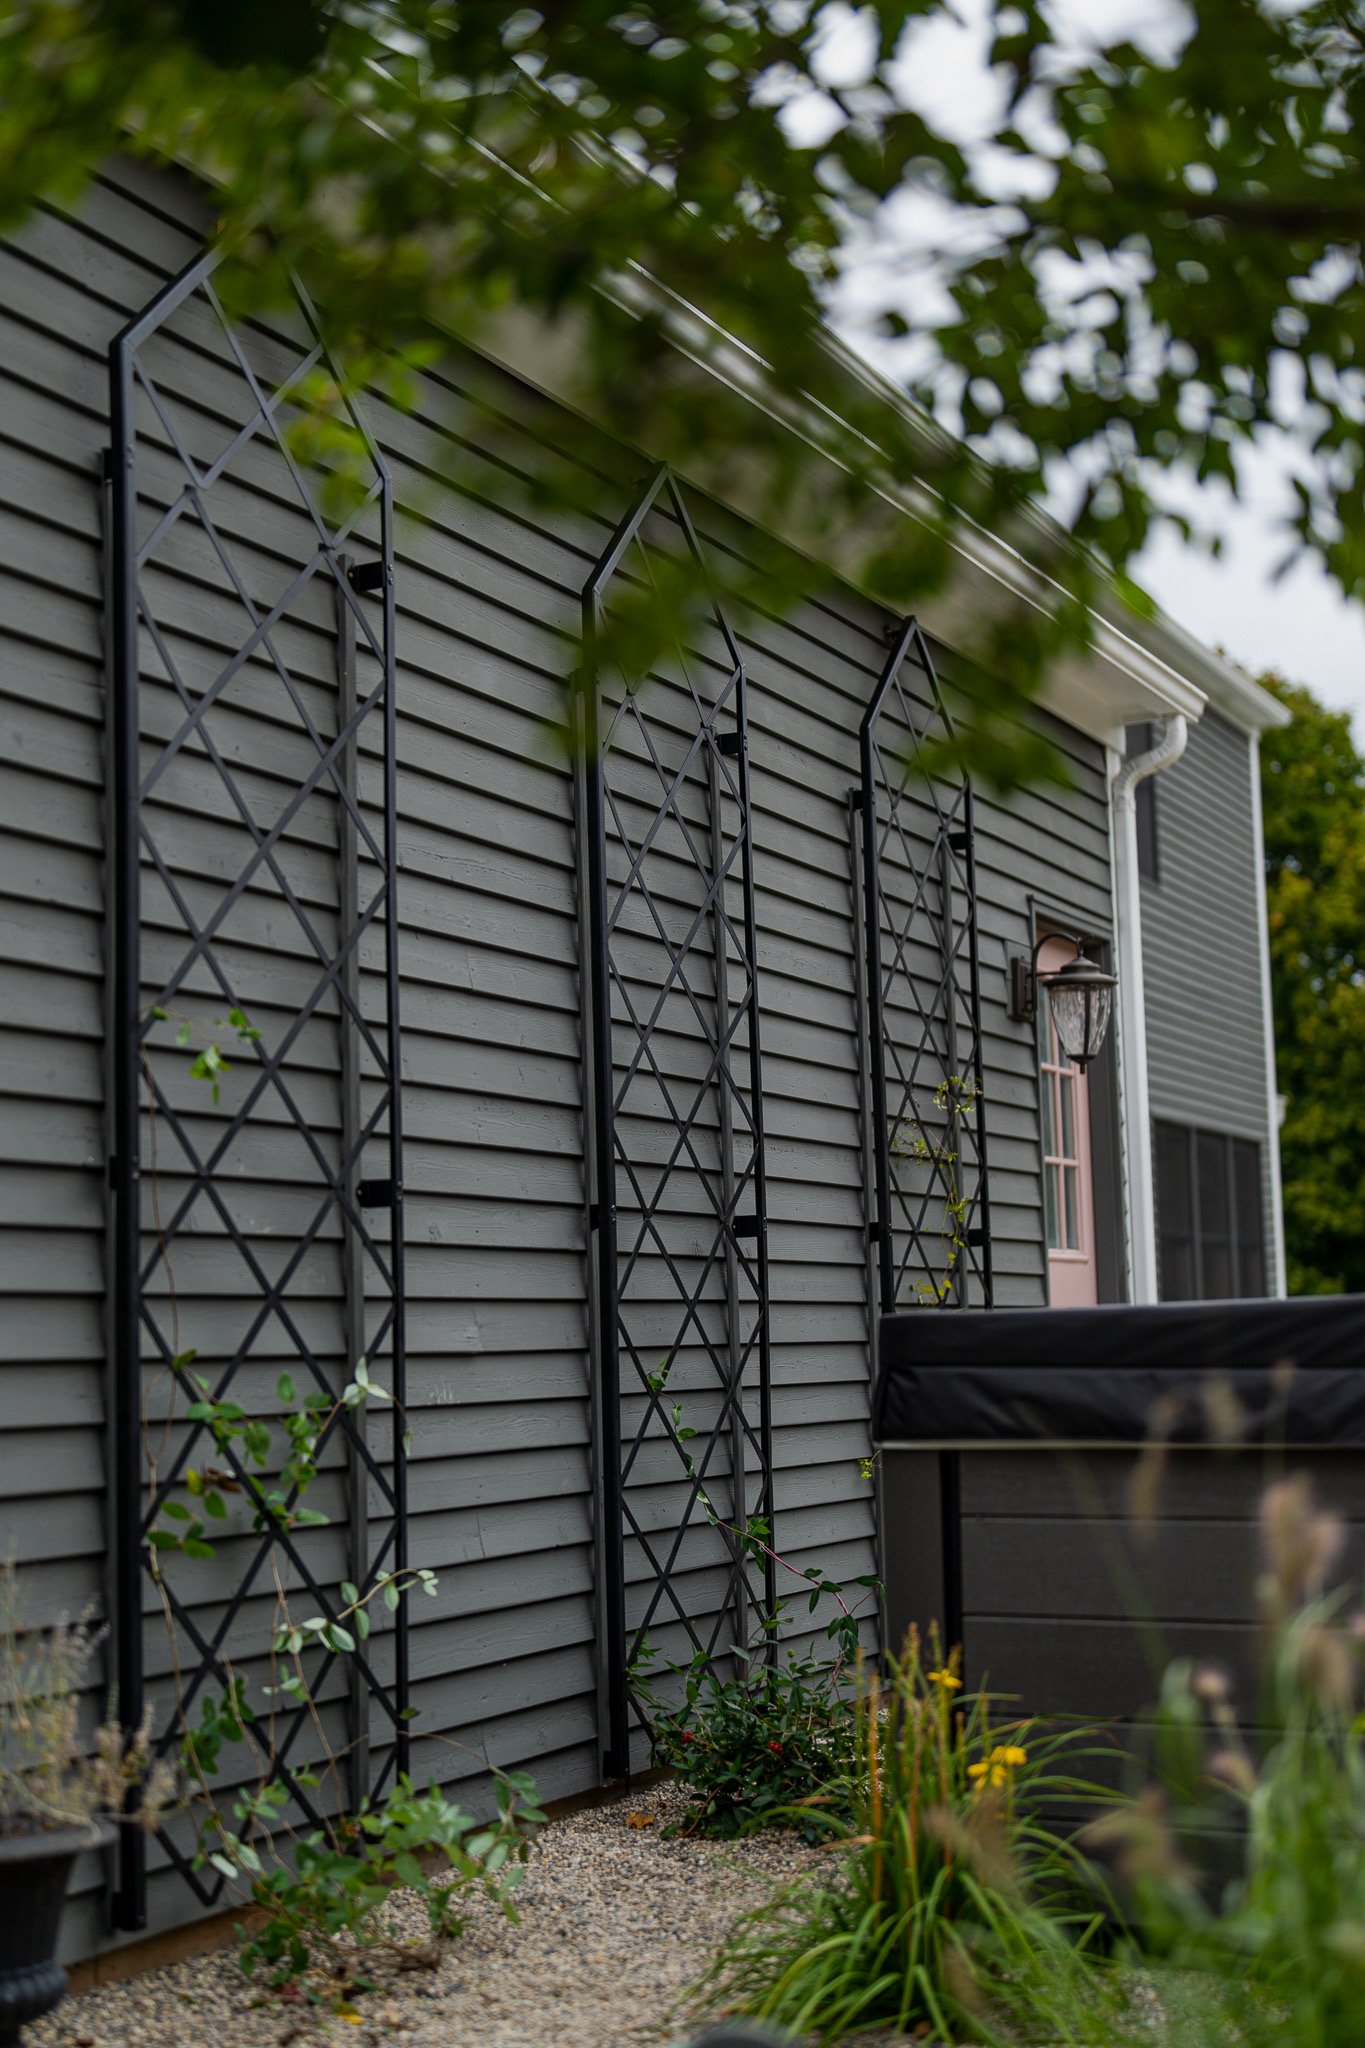
Beautiful trellises! I got these from Gardeners.com (Click HERE) and love them SO MUCH! They were exactly the backdrop I wanted behind the spa. I planted different vines on each one. Each vine blooms at a different time, so we will hopefully have flowers at all season :). These were very reasonably priced, 9ft tall and very easy to install. You can watch a video of me doing it HERE.
With all of the beauty I wasn’t about to have the cheap plastic steps that typically come with spas, so I found these metal steps (linked HERE). They are extra wide and super sturdy, which I love!
I hope this helps inspire some fab ideas for your backyard! Check back soon to see what I did in our front yard!!!!
XO
M-C
Here is the breakdown in cost for this project (in Michigan).
Labor + heavy equipment (skid loader, auger, fuel, etc) $6750
Plants + flagstone + limestone and delivery $4150
Pea stone 16 yards + ground cover and delivery $930
Irrigation supplies $200
Firepit $1100
In-ground landscape lights $1100
4 posts $120
2 string lights (Costco) $100
Adirondack chairs (8 total - Larger - Smaller) $1440
Electrician + hot tub hook up $2000
Hot Tub / Spa Masterspace Twilight SeriesTS 8.25 $15000
Spa steps (linked HERE) - $600
Paint + painter $300
Lattice wall (3) $462
Umbrellas + side table $1400
A grand total of $35652. This same space could be achieved, minus a spa, for about $18000.
We use this space during all 4 seasons and love it SO MUCH! I told my children that our backyard would be a splendid space for a wedding one day…. :). They are 7, 8 and 10, so stay tuned in about 15 years ;)!!
Here are a few more photos from the fall when colors were changing :)
As soon as fall came and my flowers started top die, I added a bird feeder. Its been lovely watching the birds all winter long in Michigan!


