Wainscoting and Wallpaper in a Living Room.

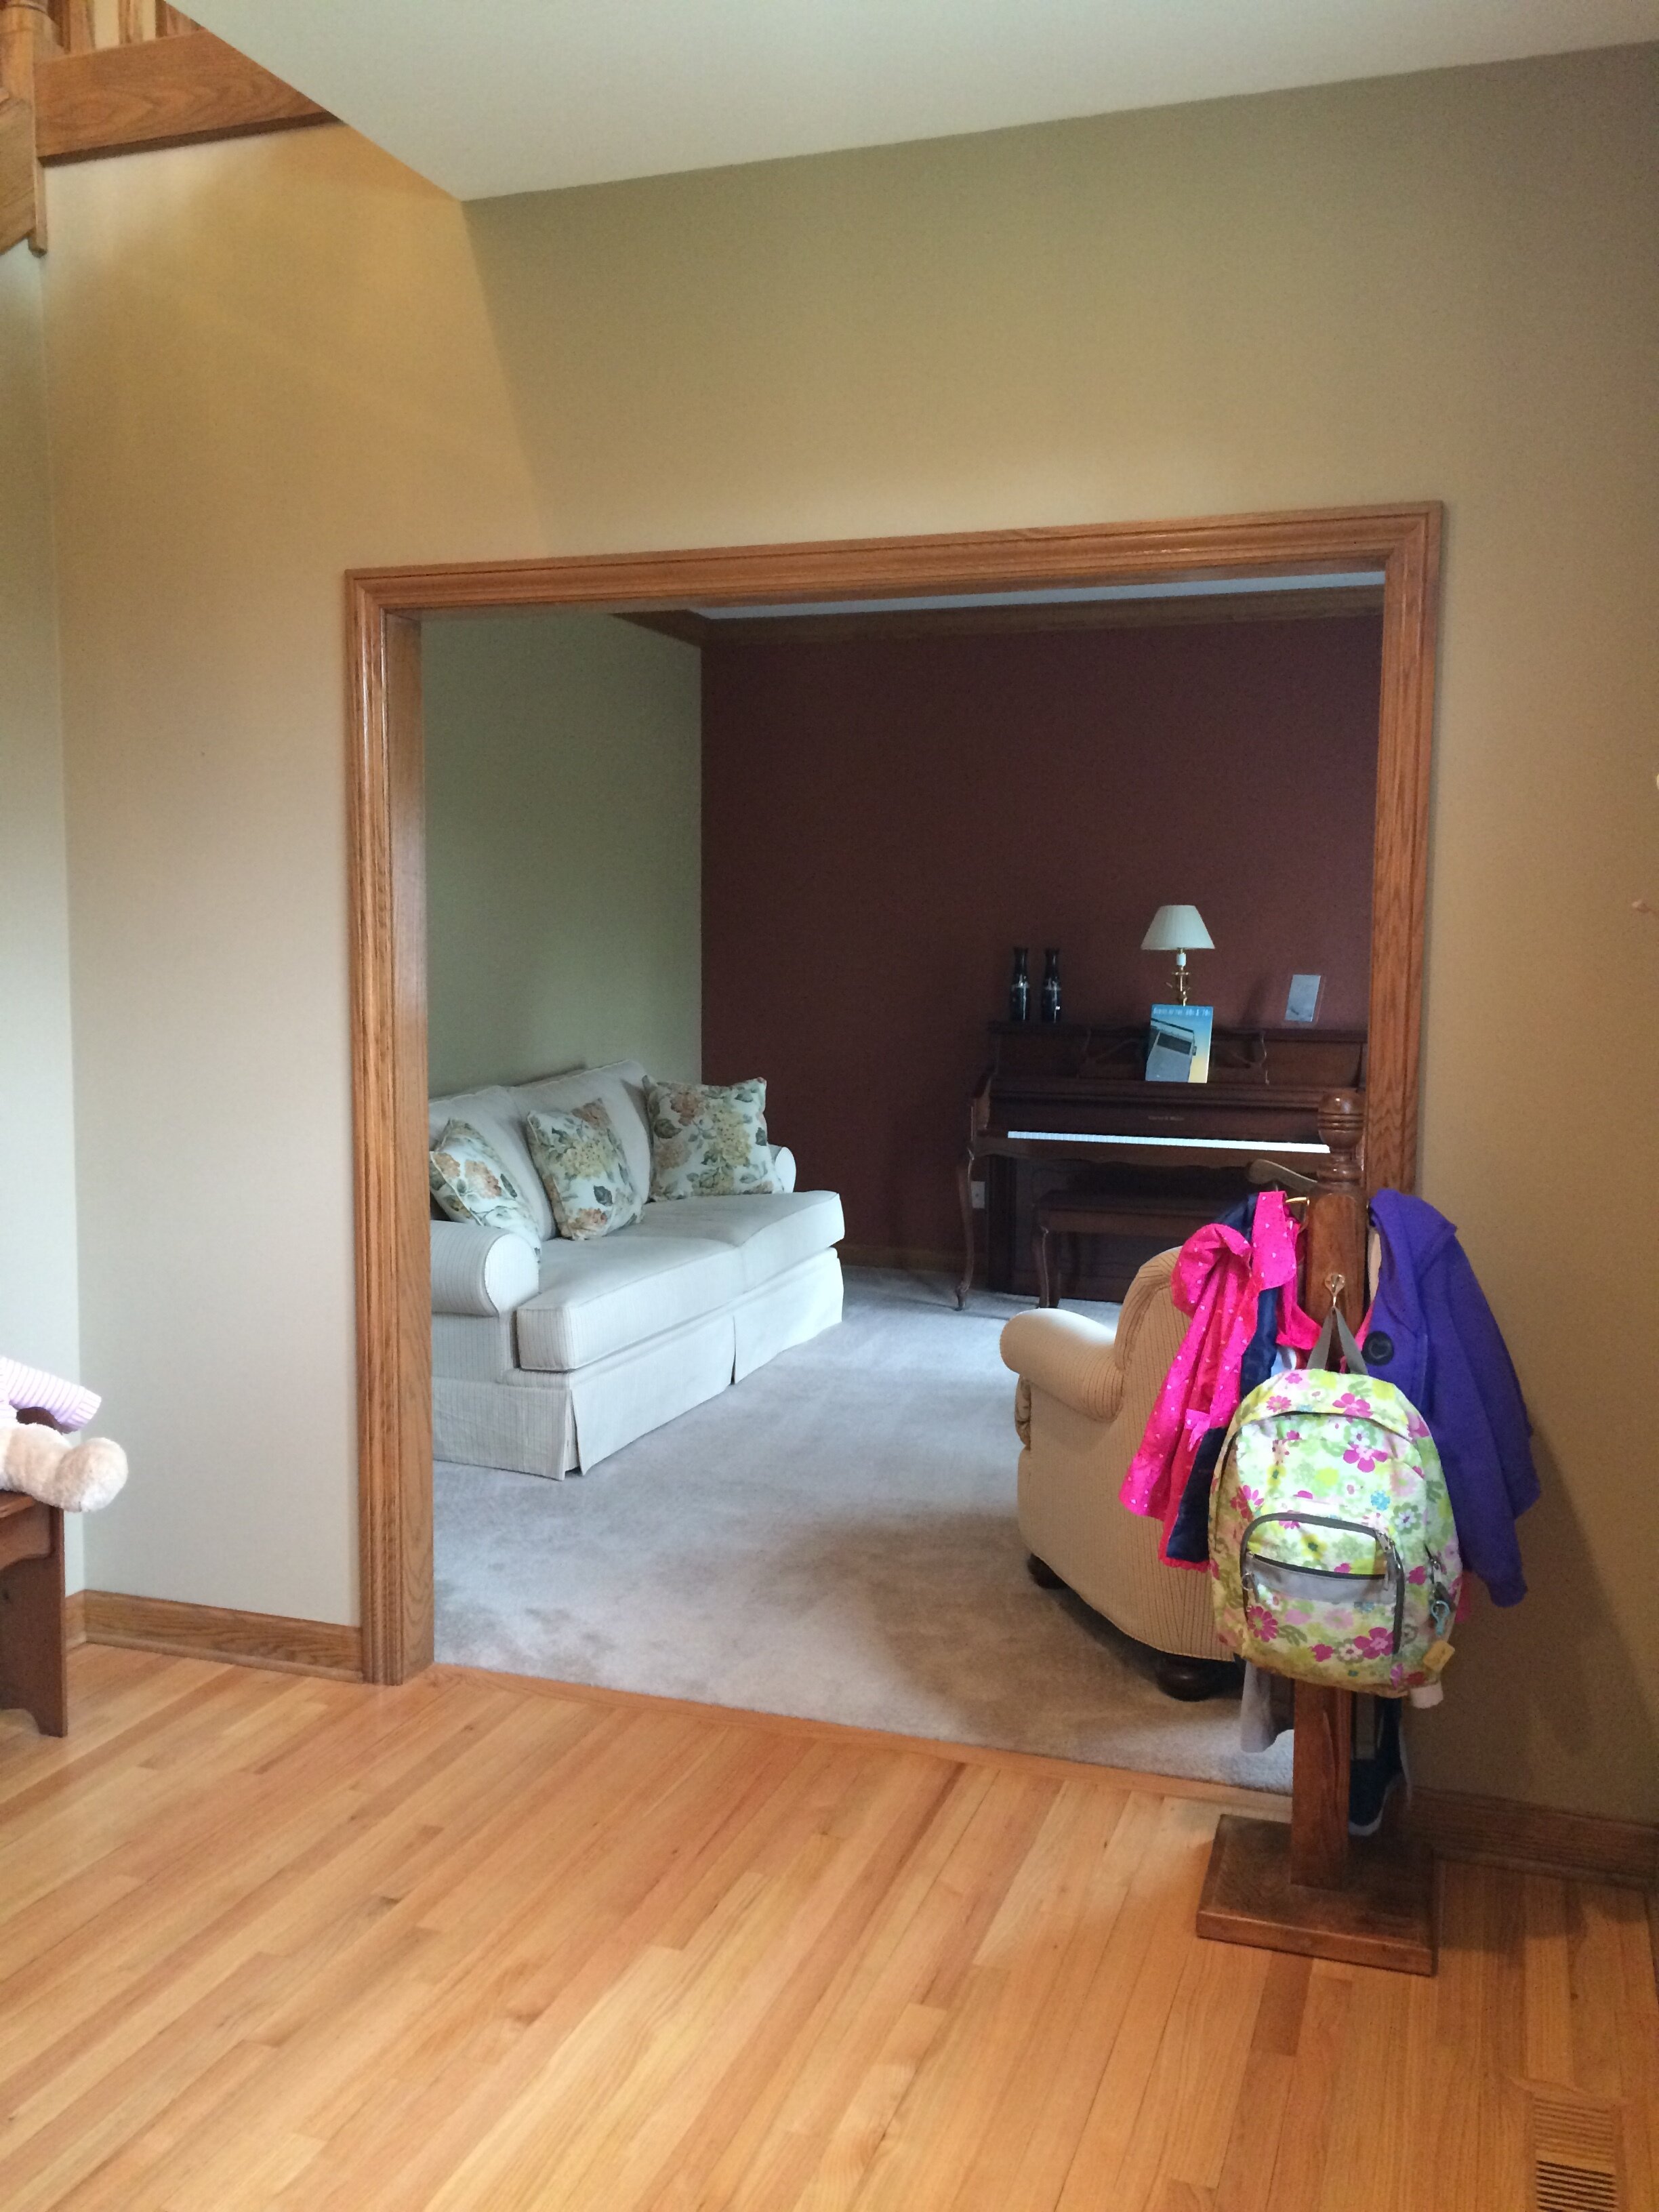
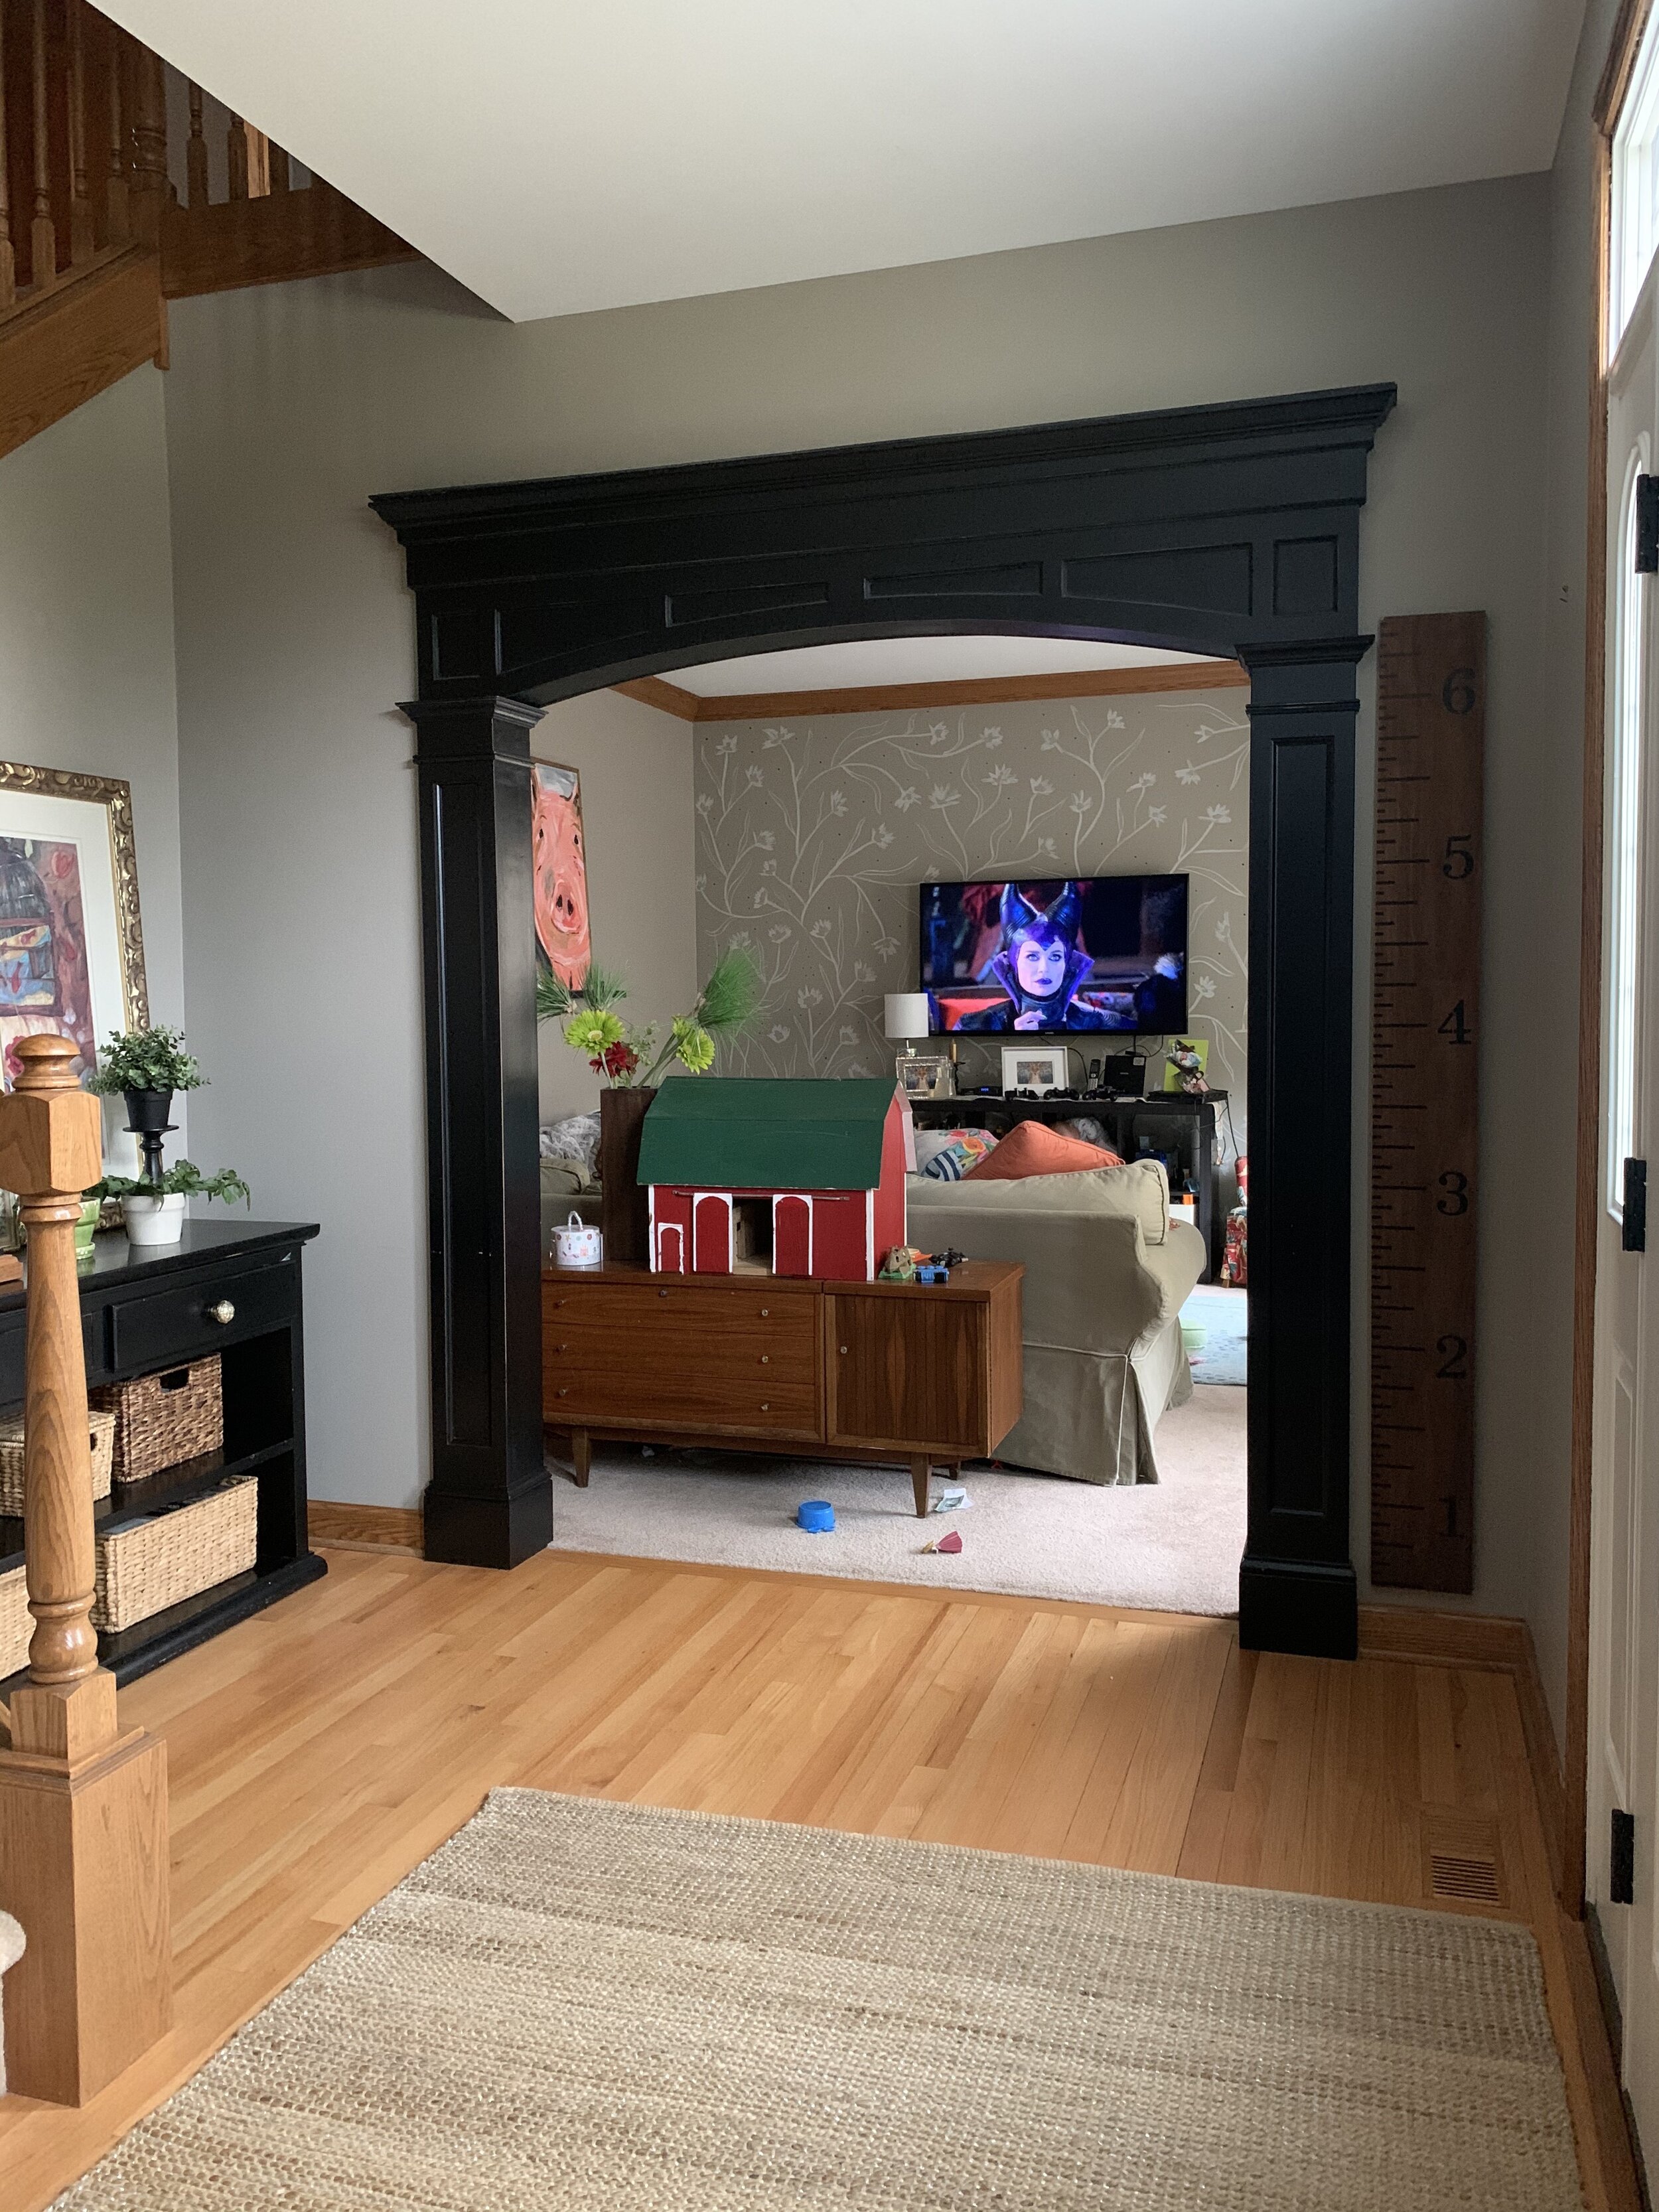
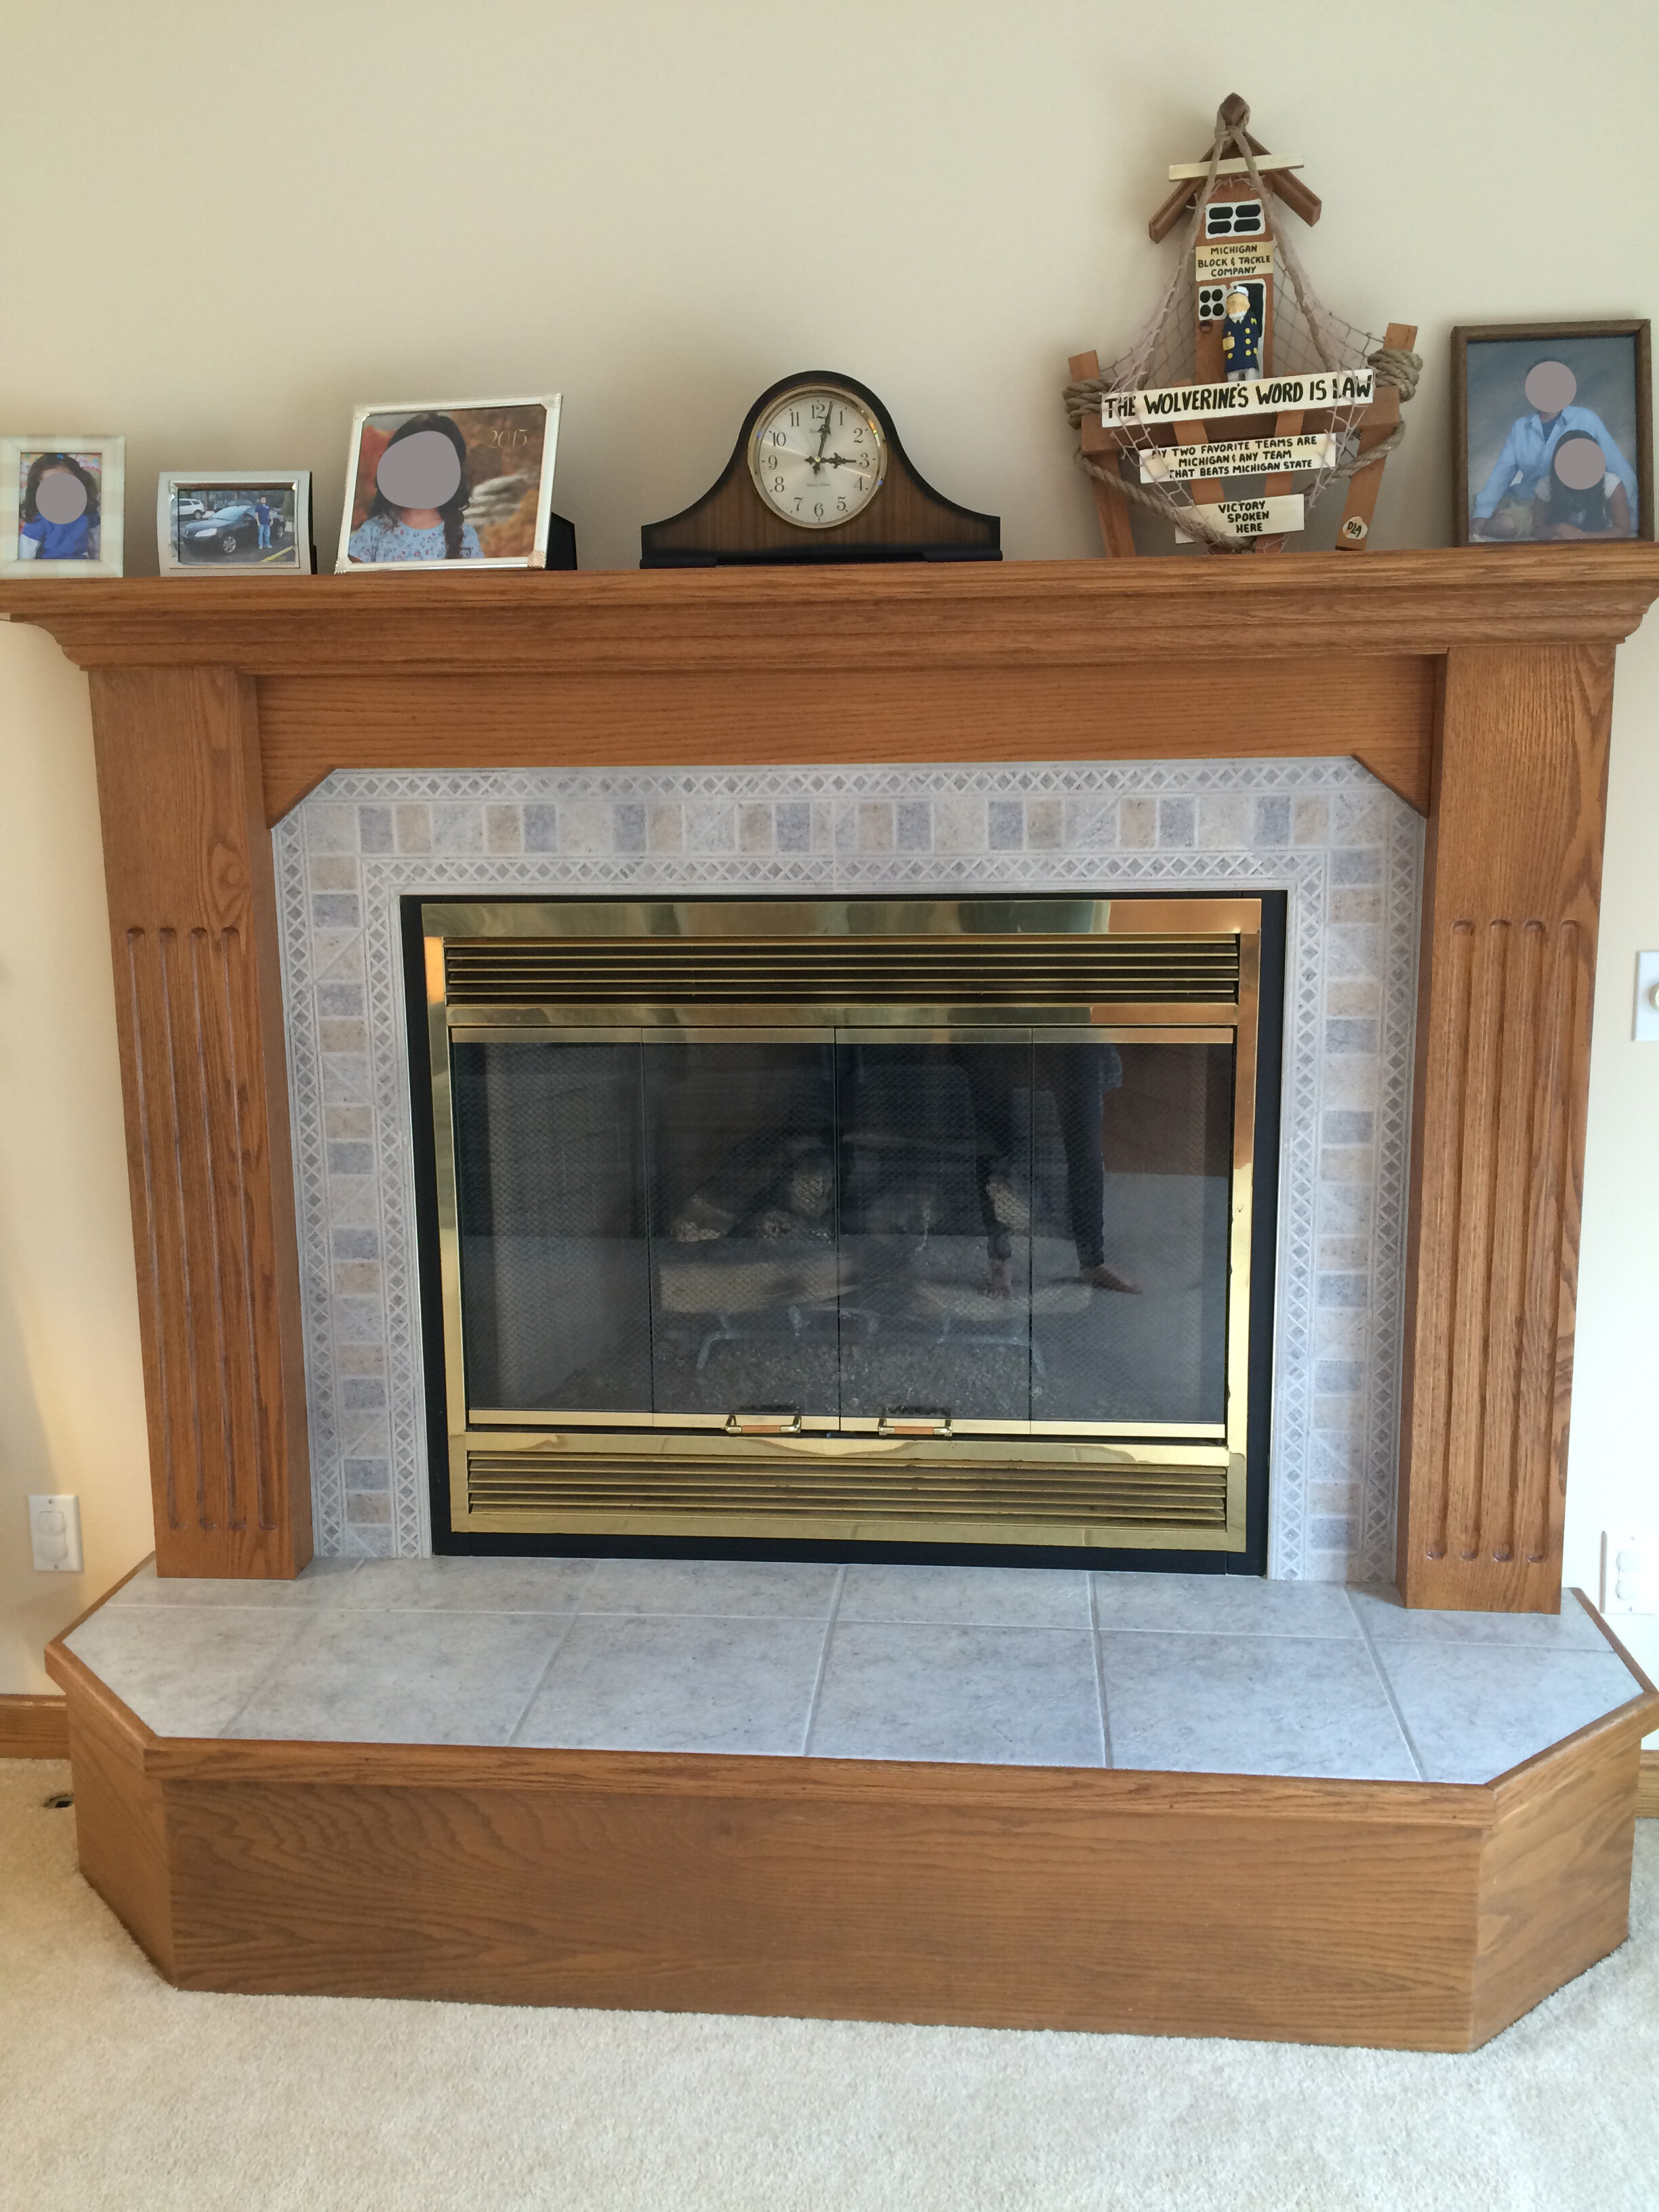
Welcome to Emily’s (my lovely assistant) living room!! 

She and her husband moved into their home, replaced the floors, had a baby and never really did anything else with this living room. 

This is where I shine, guys, in a great room that is just waiting for some oomph!!

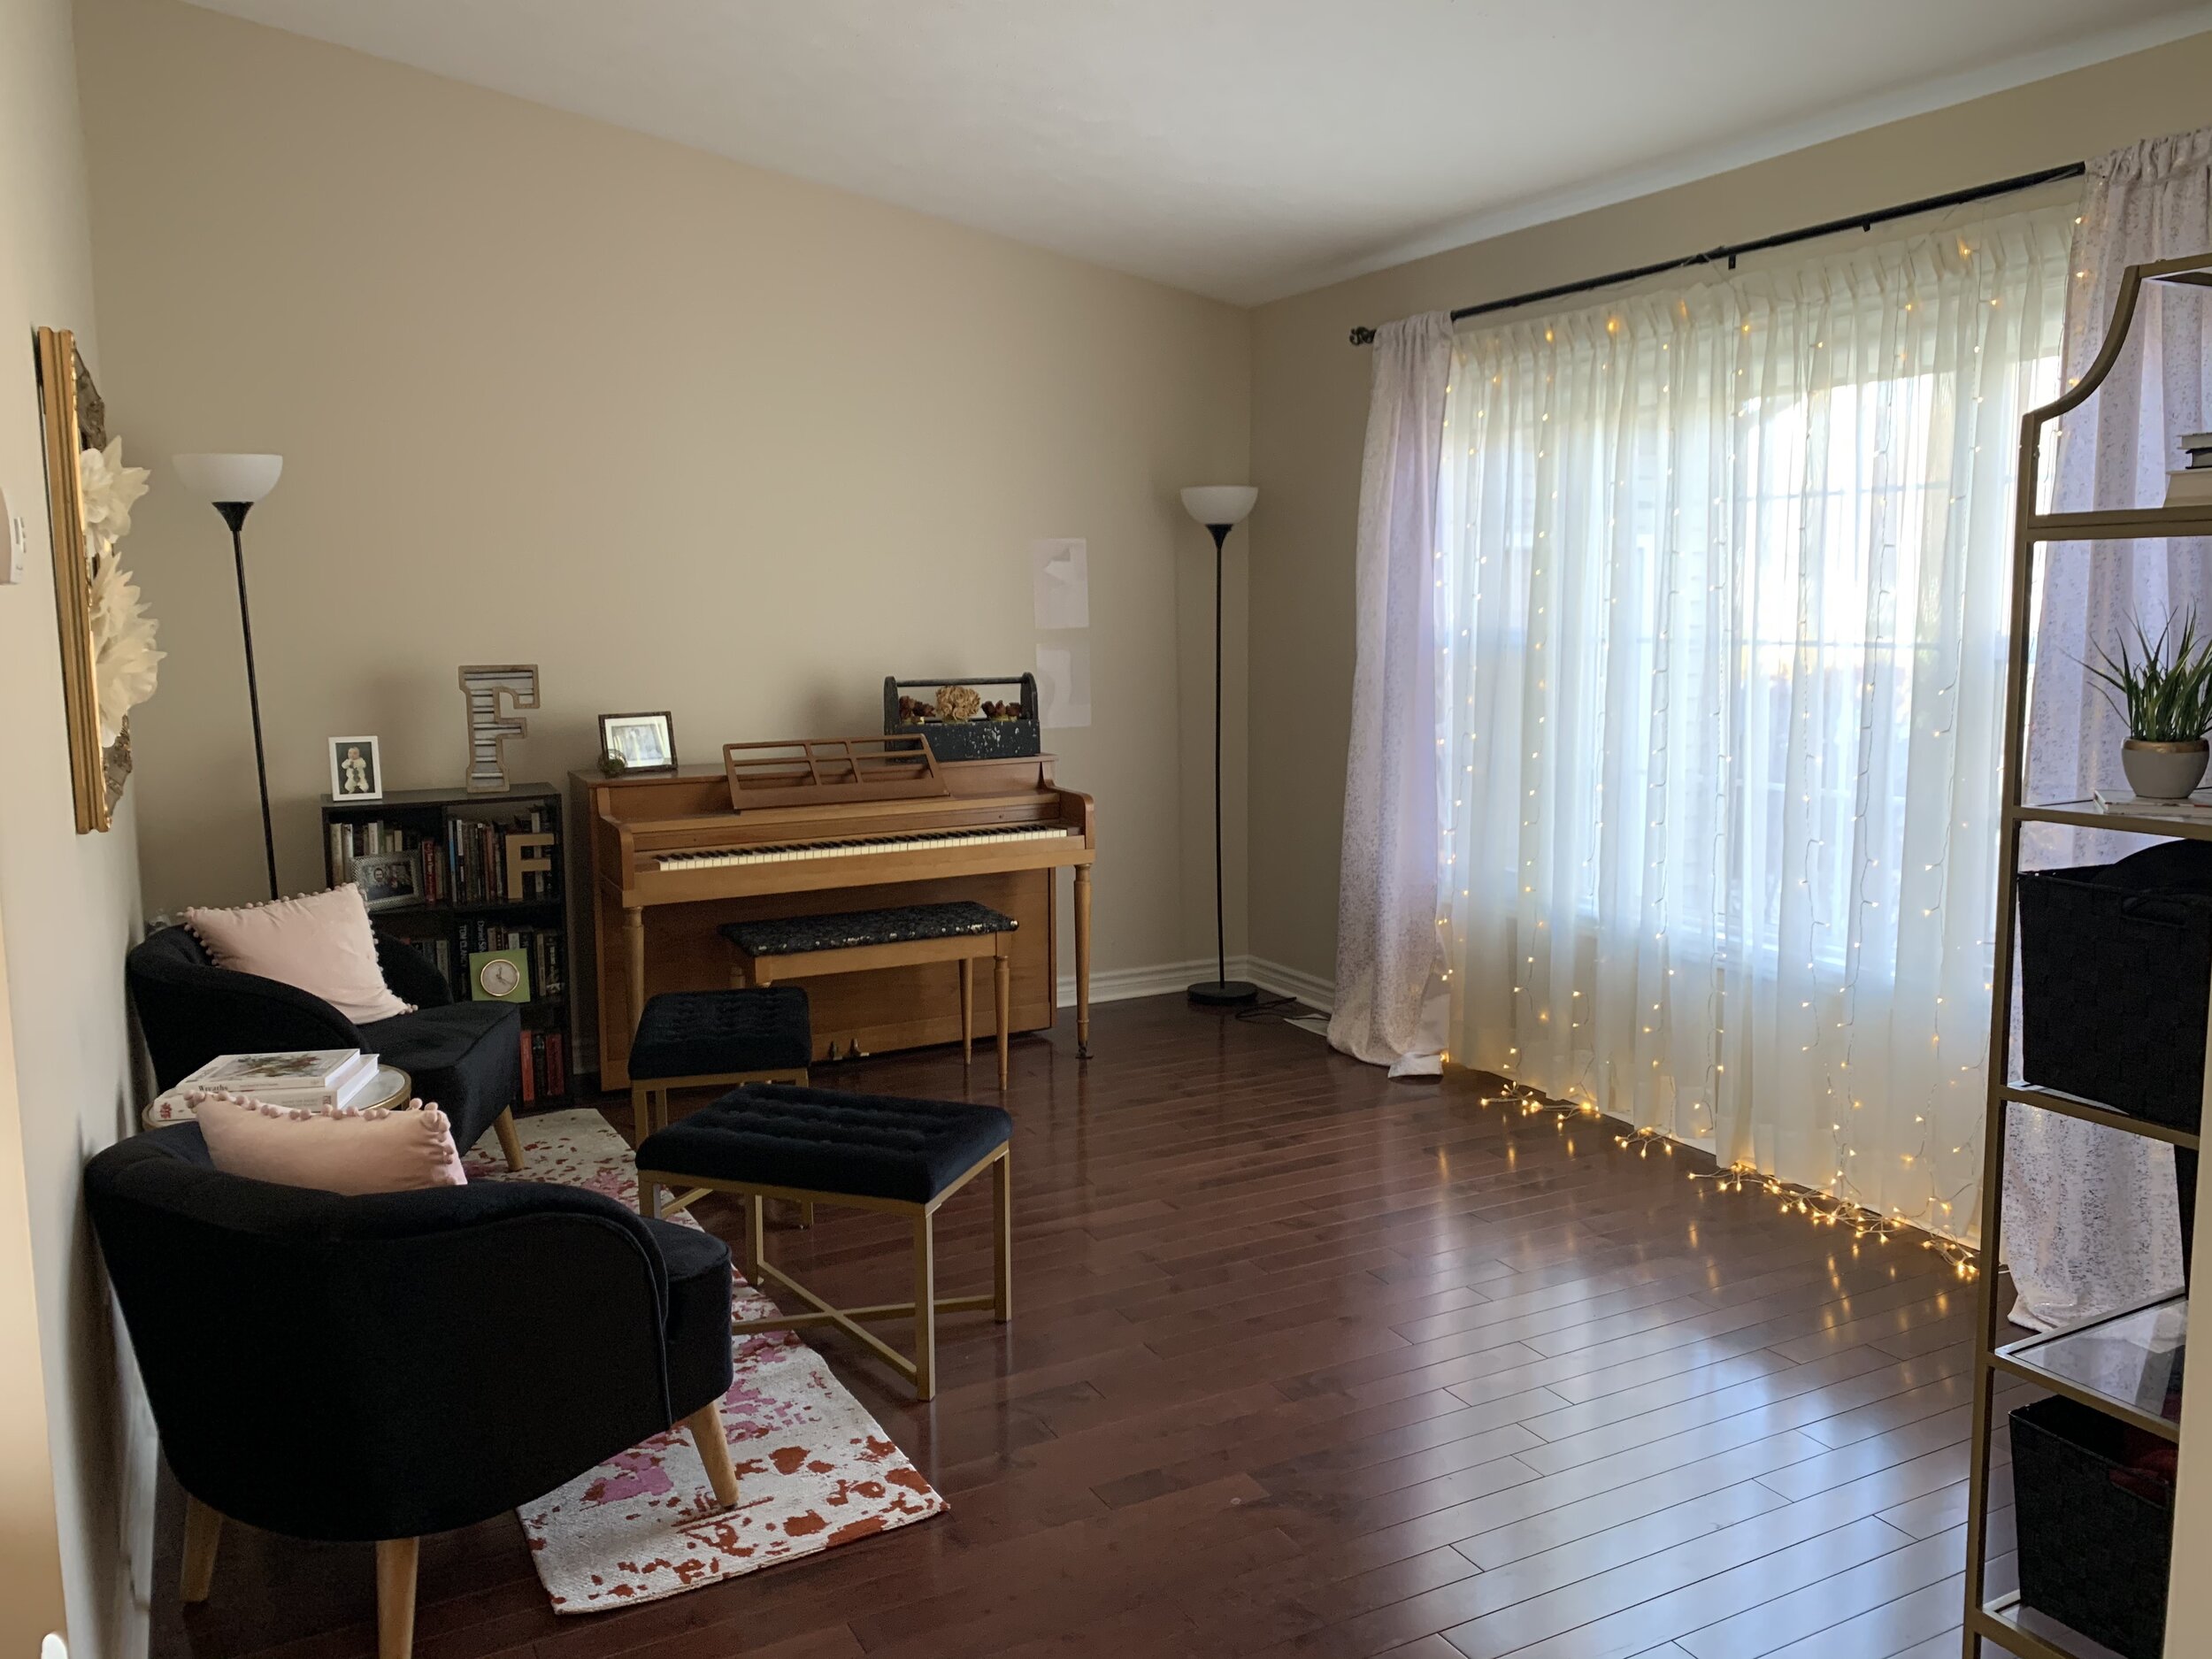
Emily wanted a space where she could relax, feel like an adult (no baby toys) and also entertain guests.

She has an existing family room with a sofa, baby toys, tv etc, so this room was a space we could turn into something really special and unique.

IMG_8029.JPG

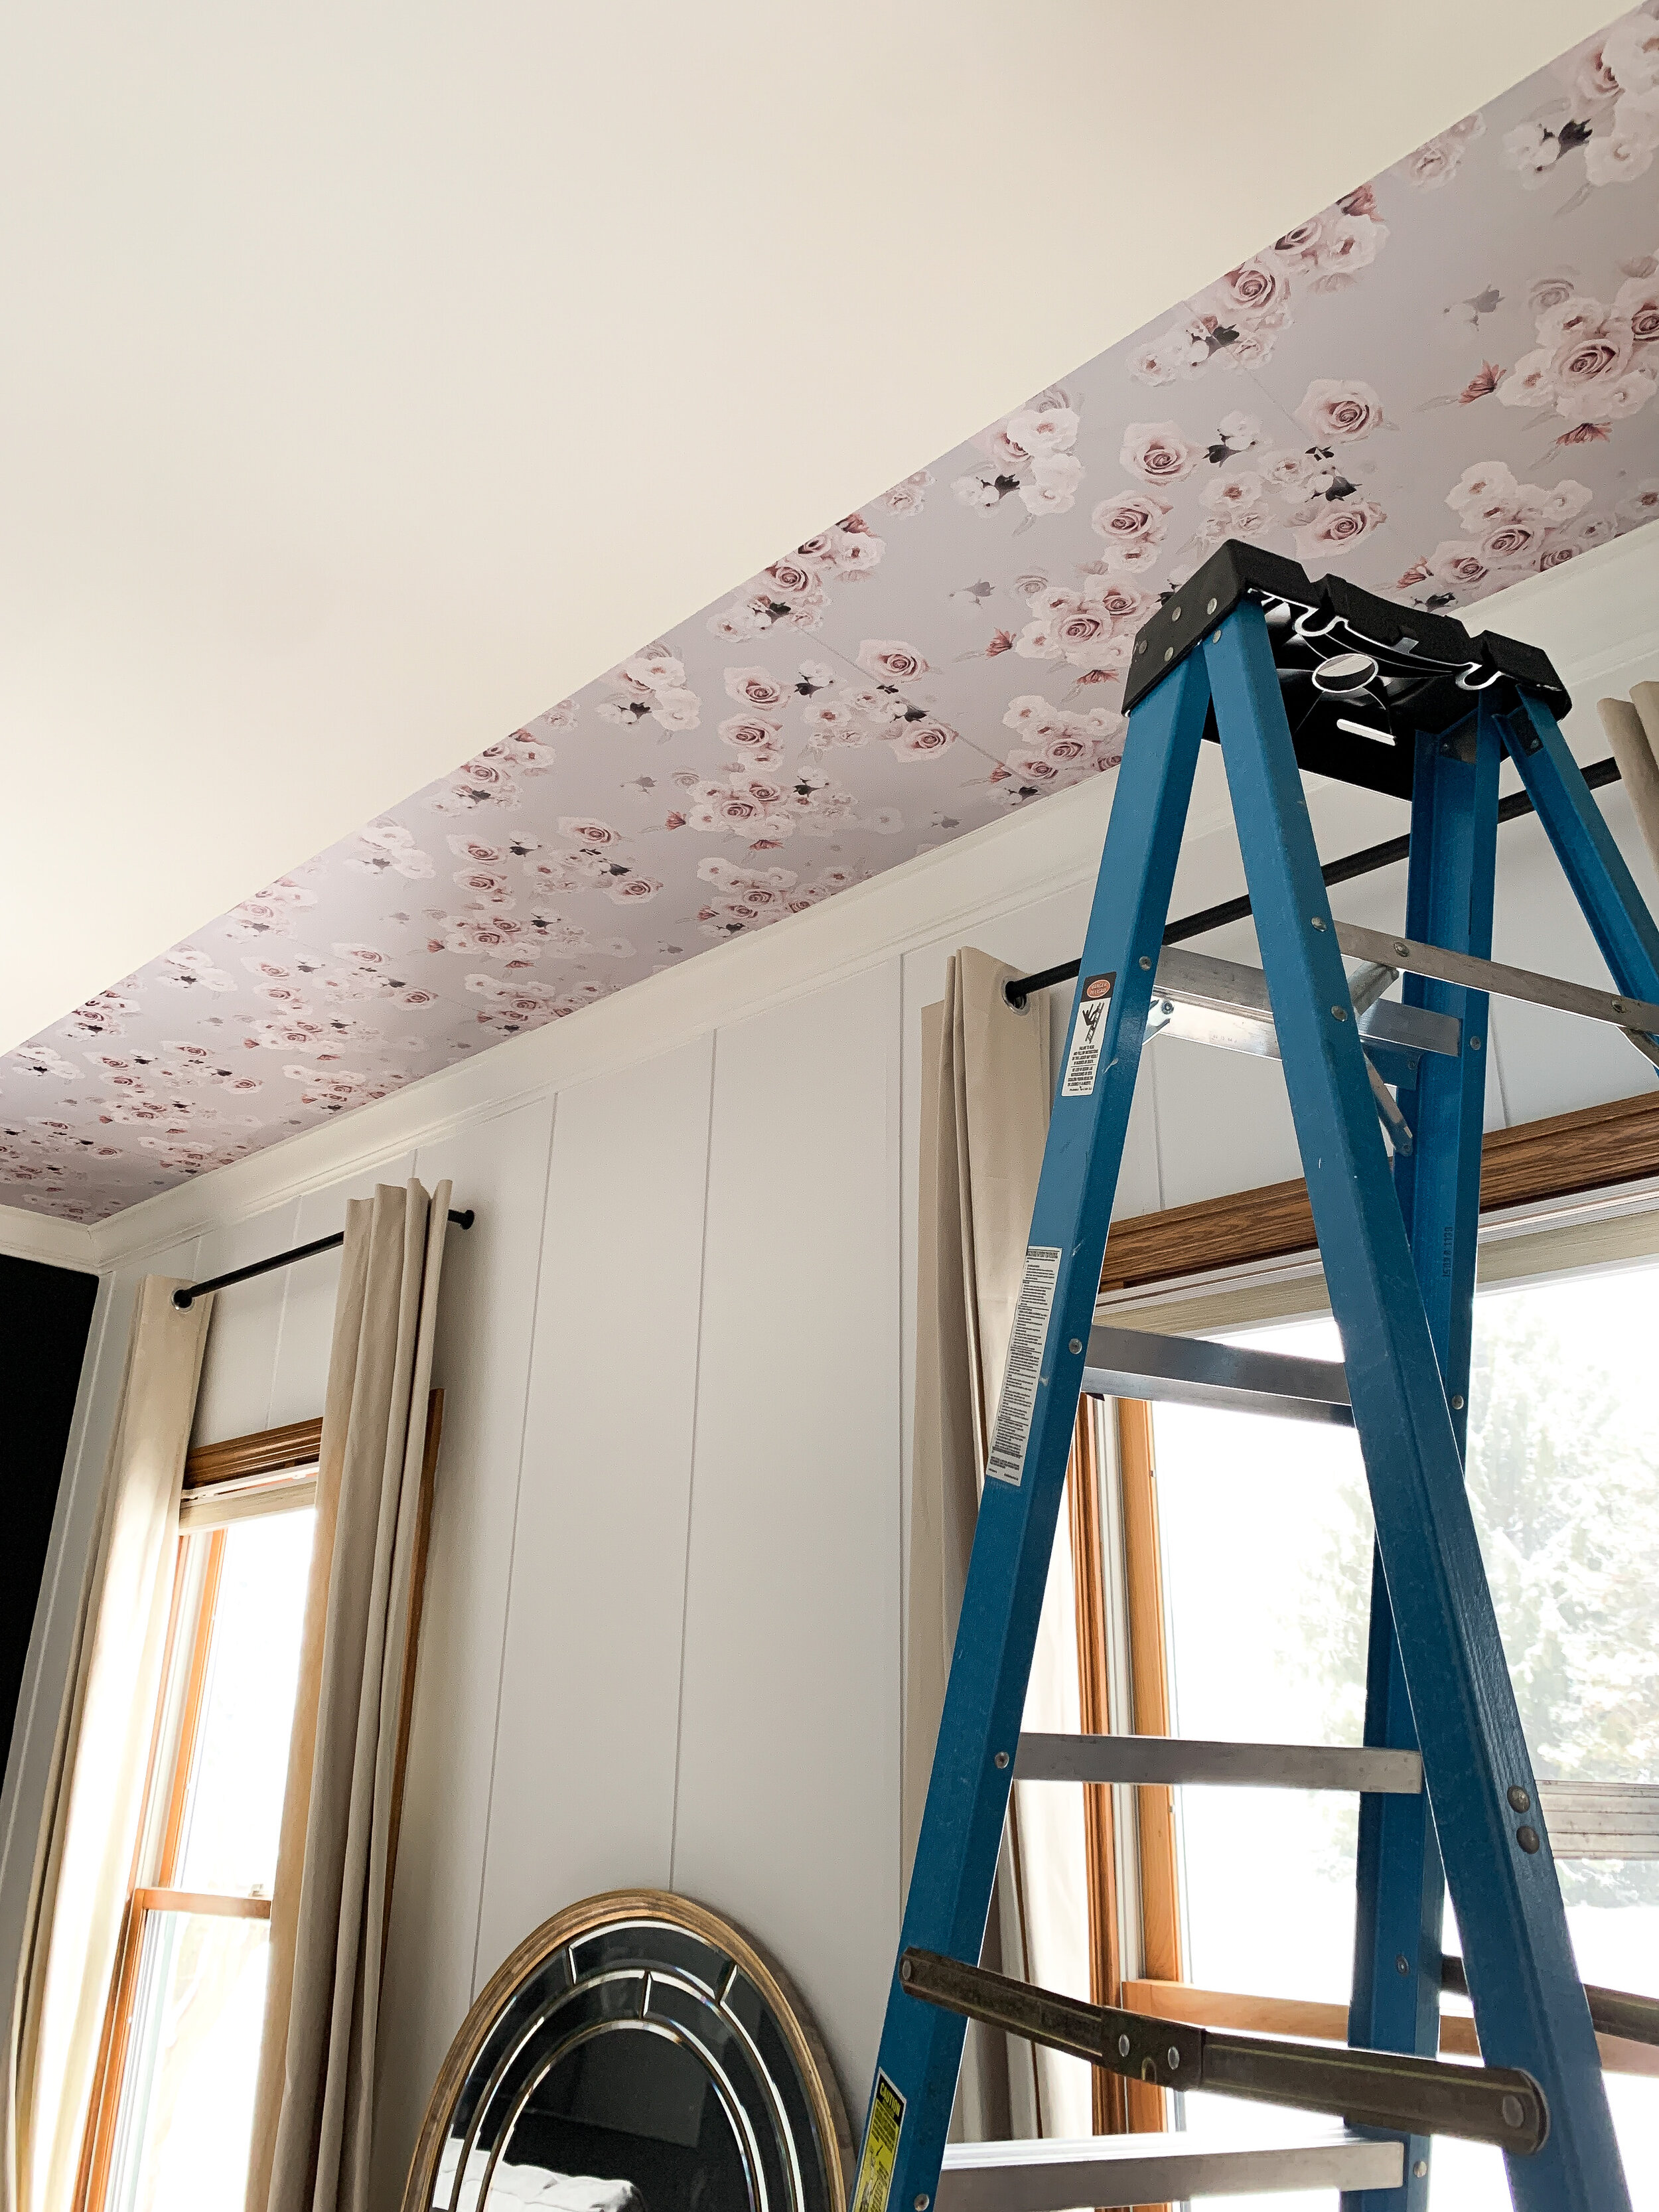
We decided to do a quick and inexpensive (even though it looks rich!) wainscoting on three walls and wallpaper on the fourth wall. We wanted to give her room some height and knew this would be the perfect way!

We headed to Lowe’s and bought:

(6) 3/4 inch 8’ strips of wood for above the existing floor trim. This makes the floor trim feel a little ‘beefier’ $29

(20) 1 1/8, 8’ strips of wood for the vertical strips on the walls $104

(1) Caulk (paintable) + (1) caulk gun $13

(1) wood filler $9

(1) gallon of Sherwin Williams Showcase Eggshell in “Nice White” $40

(1) pack of 600 grit sandpaper $8

Total spent on all 3 walls was $203

We took Emily’s wallpaper sample (Emily picked the Ivory Coast wallpaper -find it HERE) with us to Lowes to match it to a paint color. ‘Nice White’ by Sherwin Williams was great match!

IMG_43CBA9A224BC-1.jpeg

We took Emily’s wallpaper sample (Emily picked the Ivory Coast wallpaper -find it HERE) with us to Lowes to match it to a paint color. ‘Nice White’ by Sherwin Williams was great match!

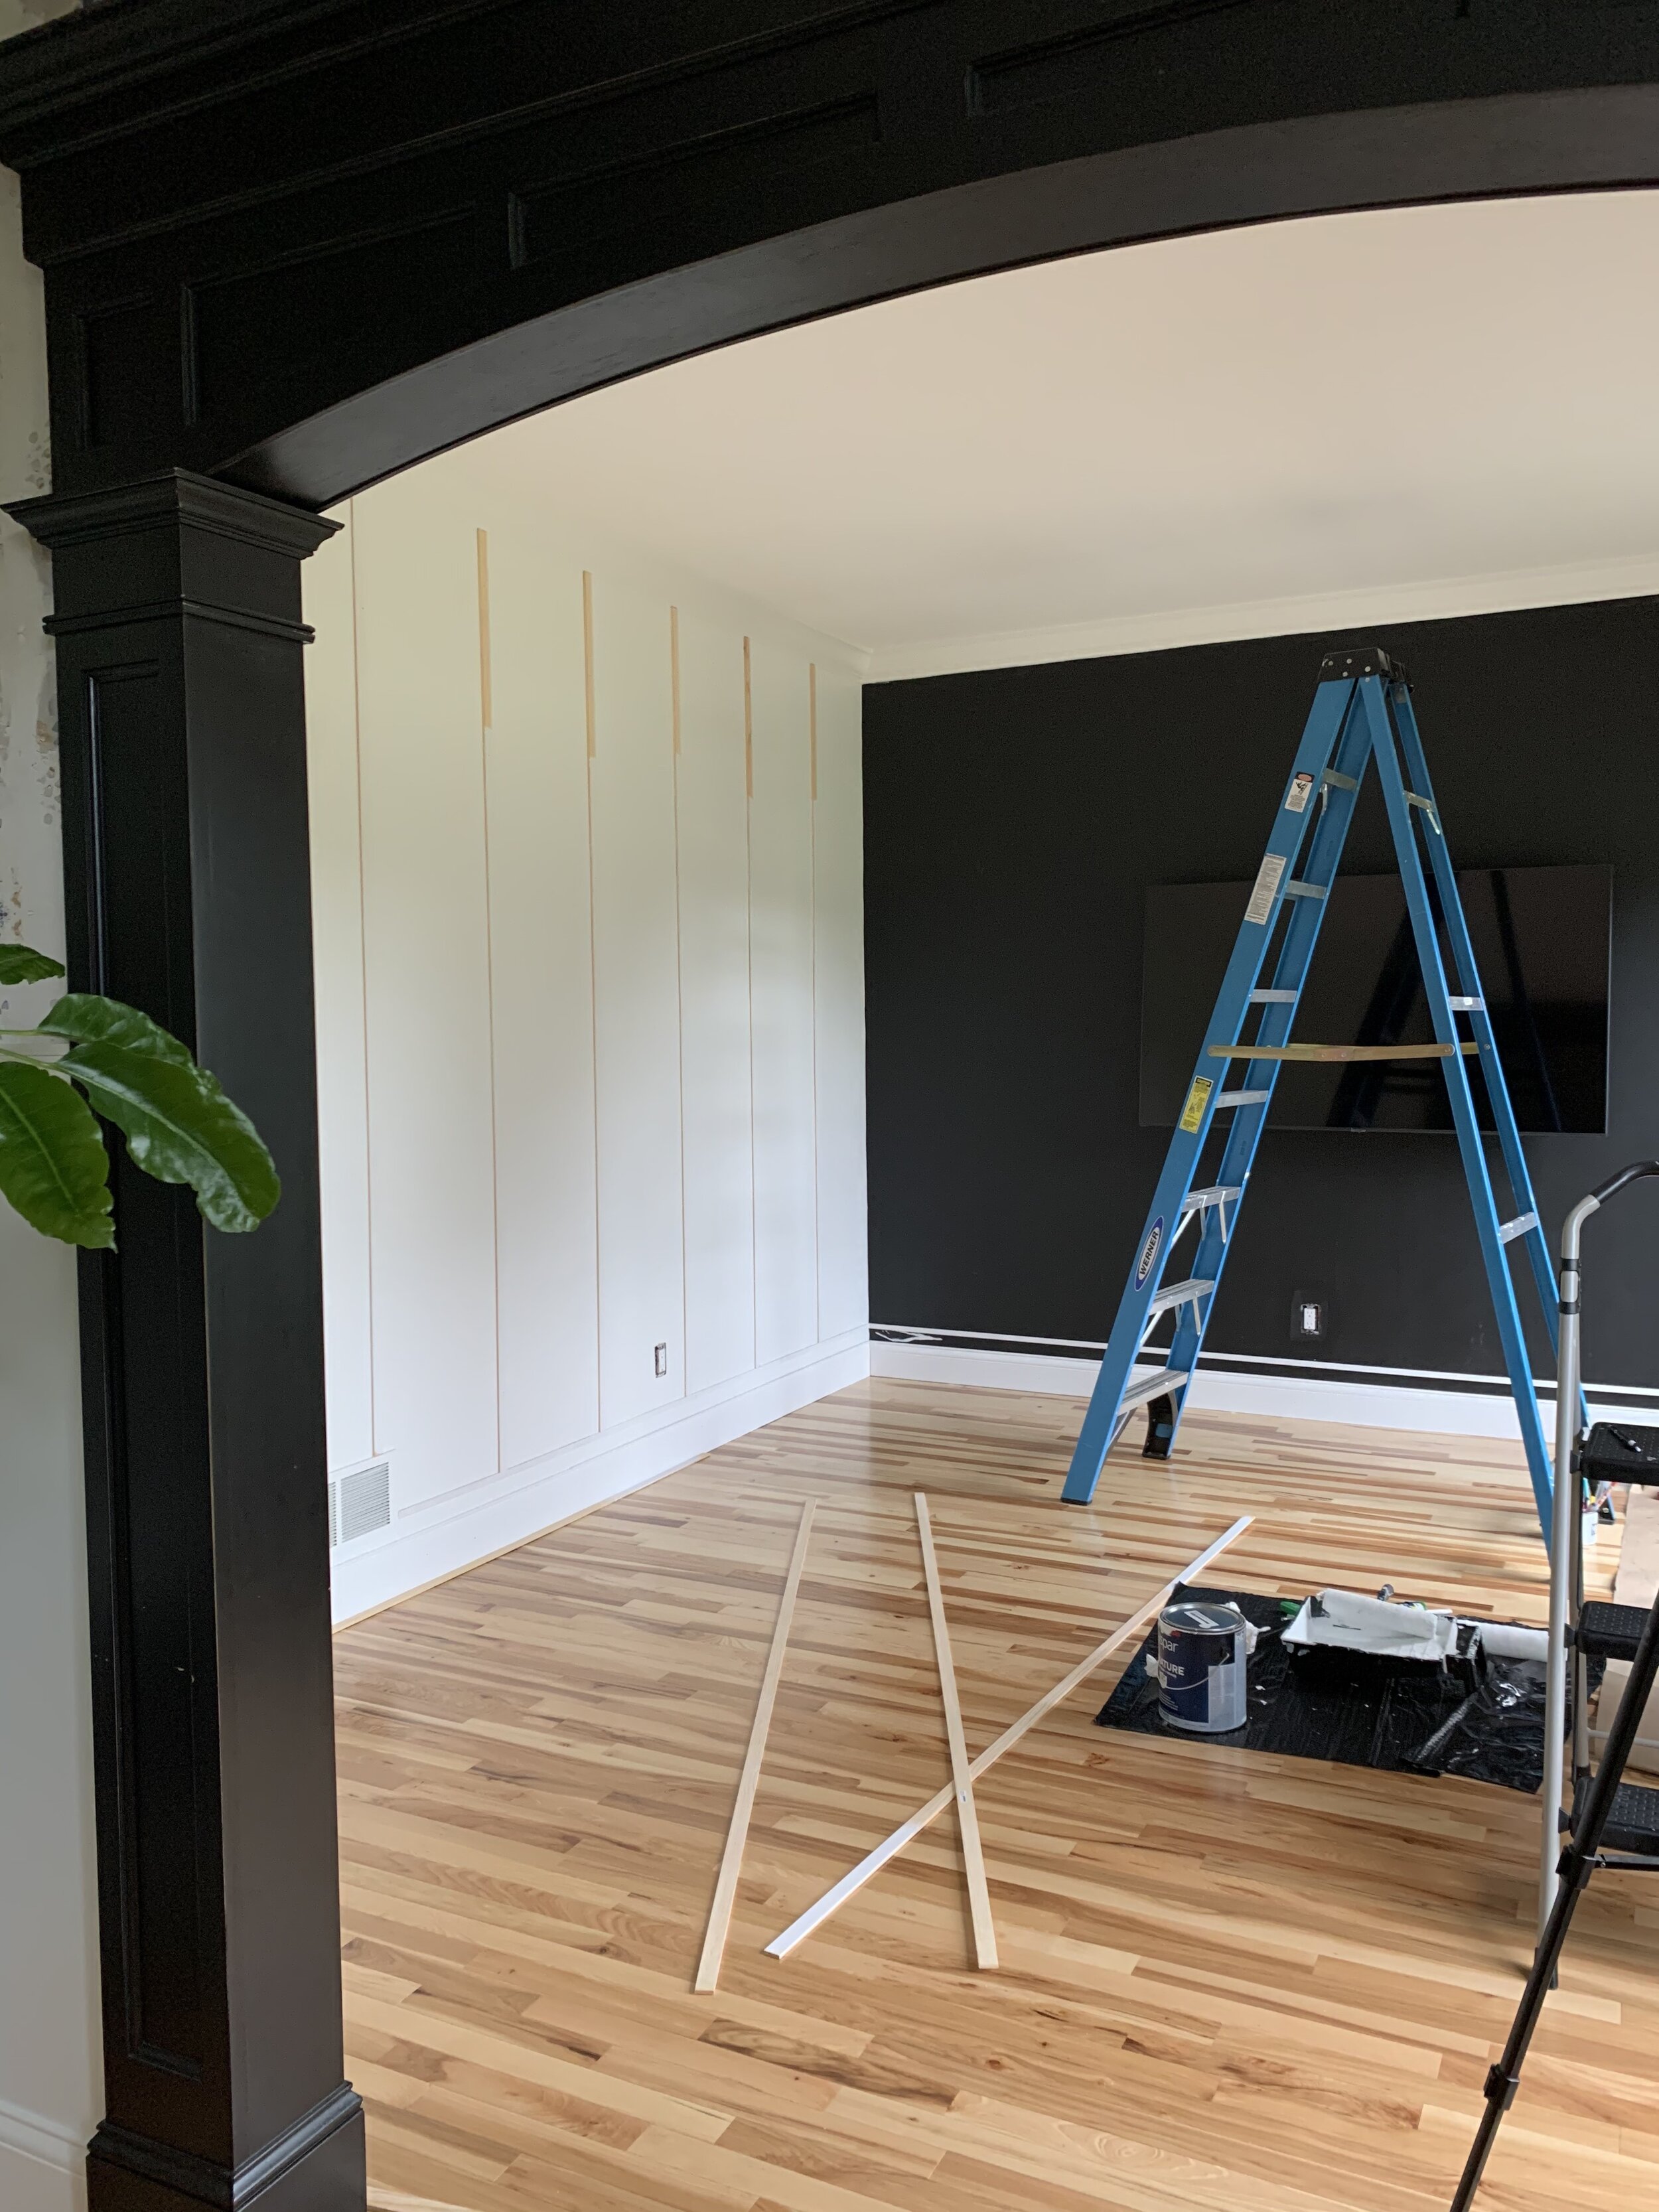
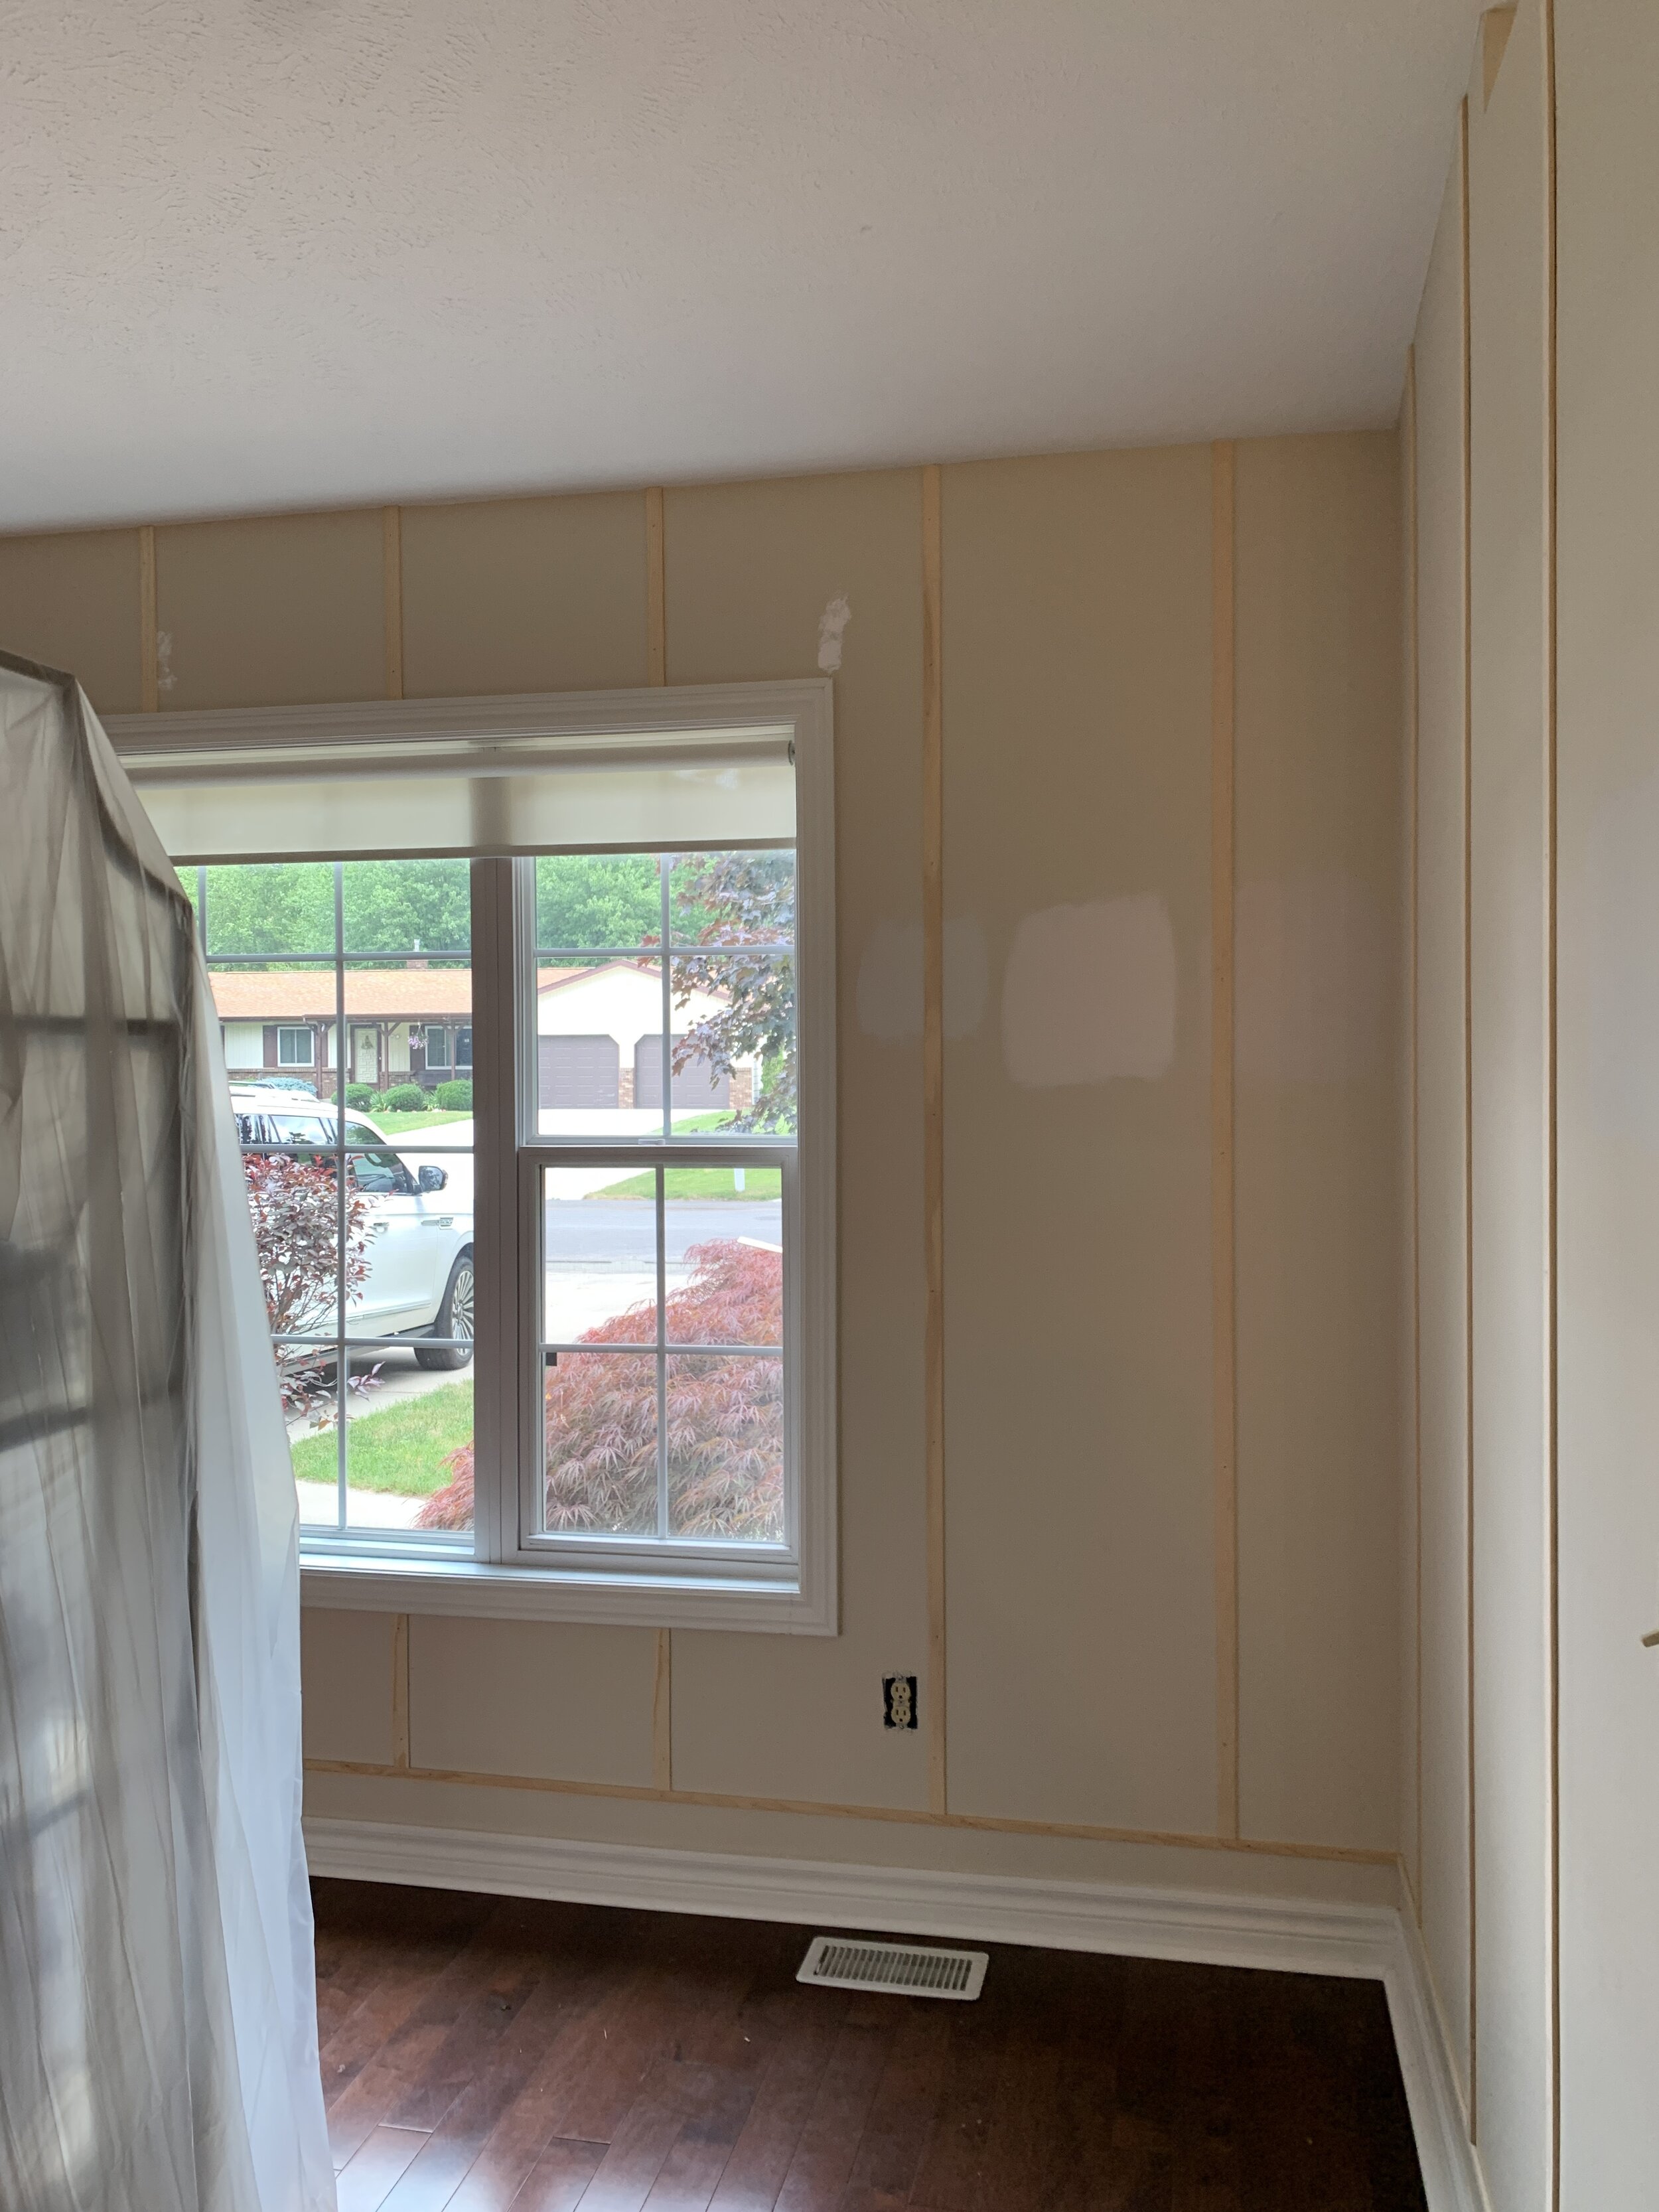
Once at home, we started sanding each piece of wood with the 600 grit sandpaper. This gives the wood a silky smooth finish.

I added one of the 1 1/8 strips of wood at each open corner (the entry into the room). This creates a seamless end of any horizontal trim. Next I started adding the 3/4 strips of wood horizontally around the room, 2 inches above the floor trim. I attached each piece to the wall with my nail gun (find it HERE, on a previous post with all of my power tools linked). Also, make sure you have a level handy to ensure that each piece is straight :).

IMG_9542 copy.jpg

Once all of those were in place, I started adding the vertical strips above, every 18 inches. I also attached these with my nail gun and used the level as well. Since these strips were only 8’ long, we had to cut and add a few additional inches at the top, for the vaulted wall. Emily and I worked together on this and the entire room took about 6 hours total.

wainscoting on vaulted wall.JPG

Next up was caulking the sides of the trim pieces, and filling the nail holes. Some people skip this step, but let me tell ya… if you like your things nice and pristine, do not skip this step. This creates a seamless seal and finish on your wainscoting. To wipe off any excess caulk, we use a mix of Dawn soap + water and a rag. Once the wood filler dries (in the nail holes) Emily sanded off any excess with the 600 grit sand paper.

Now it was ready for paint!! Using a nice paint is worth every penny. You can tell the difference in the thickness of the paint and how well it covers. One time I bought a paint that was not my first choice. I ended up needing 4 coats of paint in my space. That was a pain in the butt, but I learned my lesson!! Pay the extra $20 for the nice stuff. 

Emily’s living room took 2 coats of paint (only 1 gallon). She had some paint rollers on hand, so we did not need to buy those. 

Even though we were going to cover one of the walls with wallpaper, we still painted it. Having a base color that matches your wallpaper is always a plus! If for any reason your seams do not meet up or you trim a piece a little too short, that matching base paint will camouflage any mistakes :). Emily painted with her father-in-law and this it took them a full day to complete.

IMG_0087.JPG

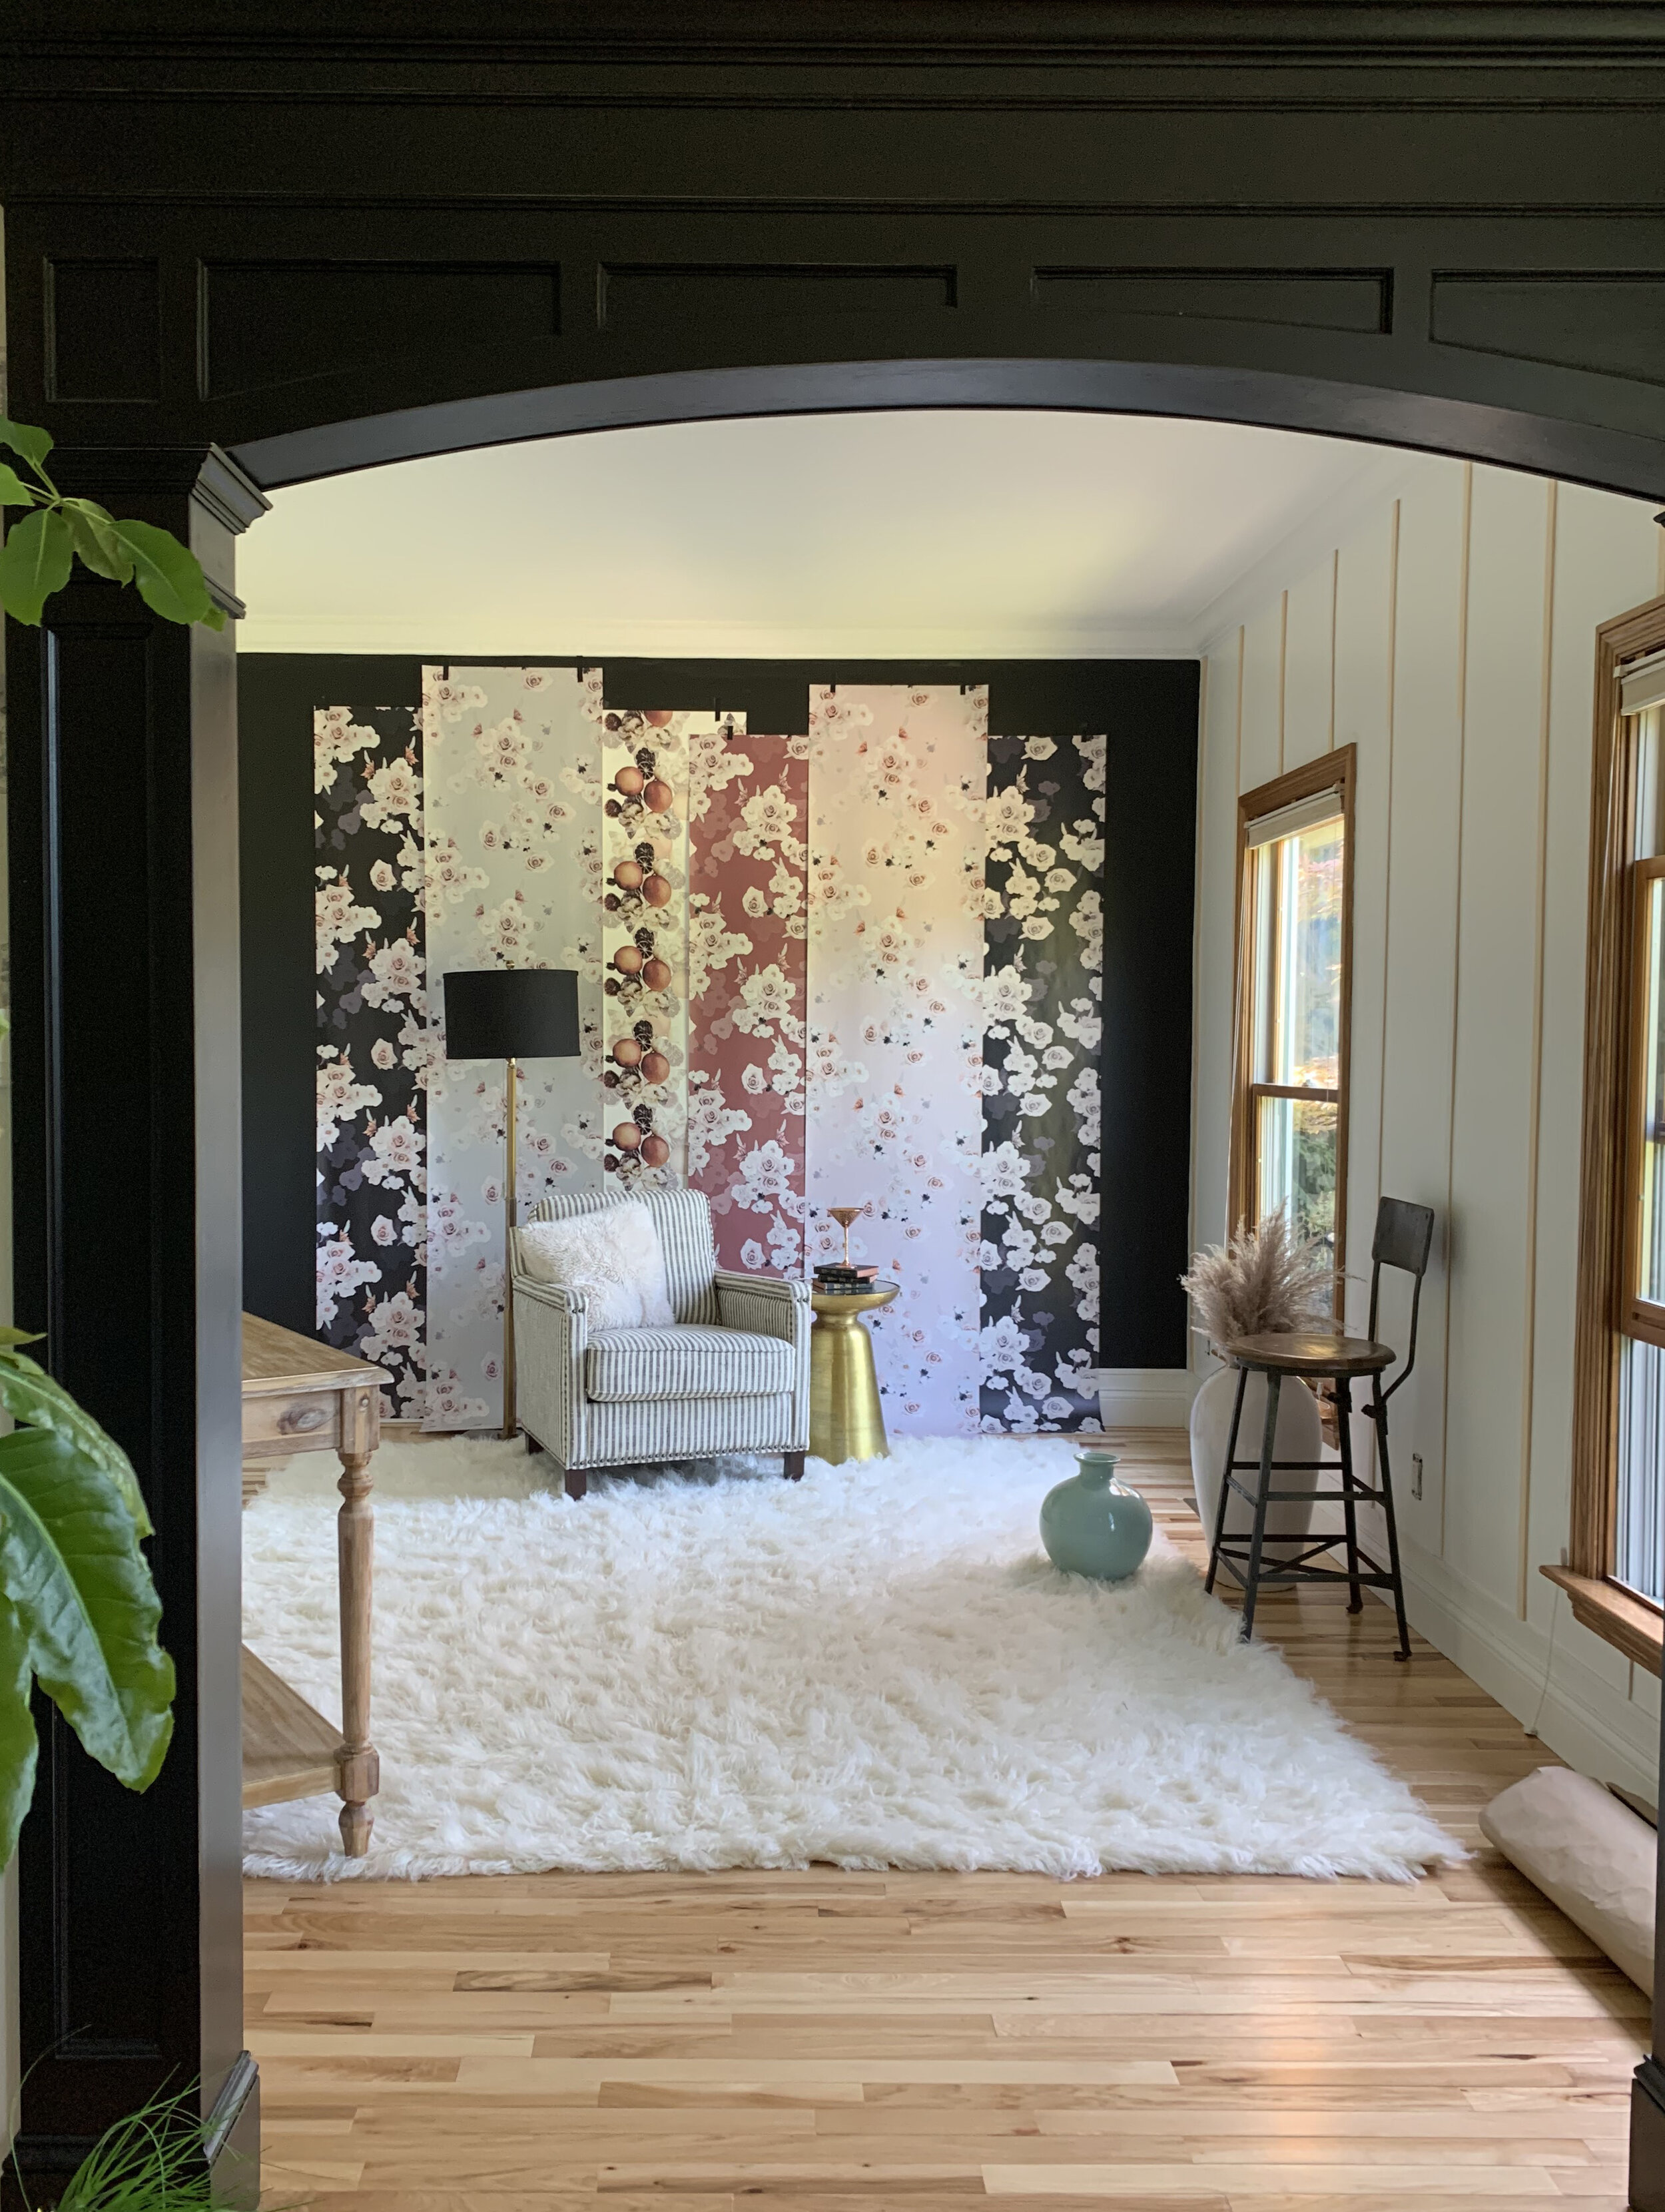
Next up, wallpaper!! This part is the icing on the cake. It made the entire room come to life!!

Since prepasted wallpaper strips are sold according to ceiling height, we were able to order exactly what we needed, without any waste. On Emily’s vaulted ceiling, we used (1) 10’, (3) 9’ and (2) 8’ (Shop all of the wallpapers HERE).

We started at the highest point (with the 10’ wallpaper) and worked our way down. When working with a vaulted wall, you want to have any excess/trimmable wallpaper at the top, rather than at the bottom. 

Wallpapering this wall took about 2 hours total.

IMG_A27DCECEE2A0-1.jpeg

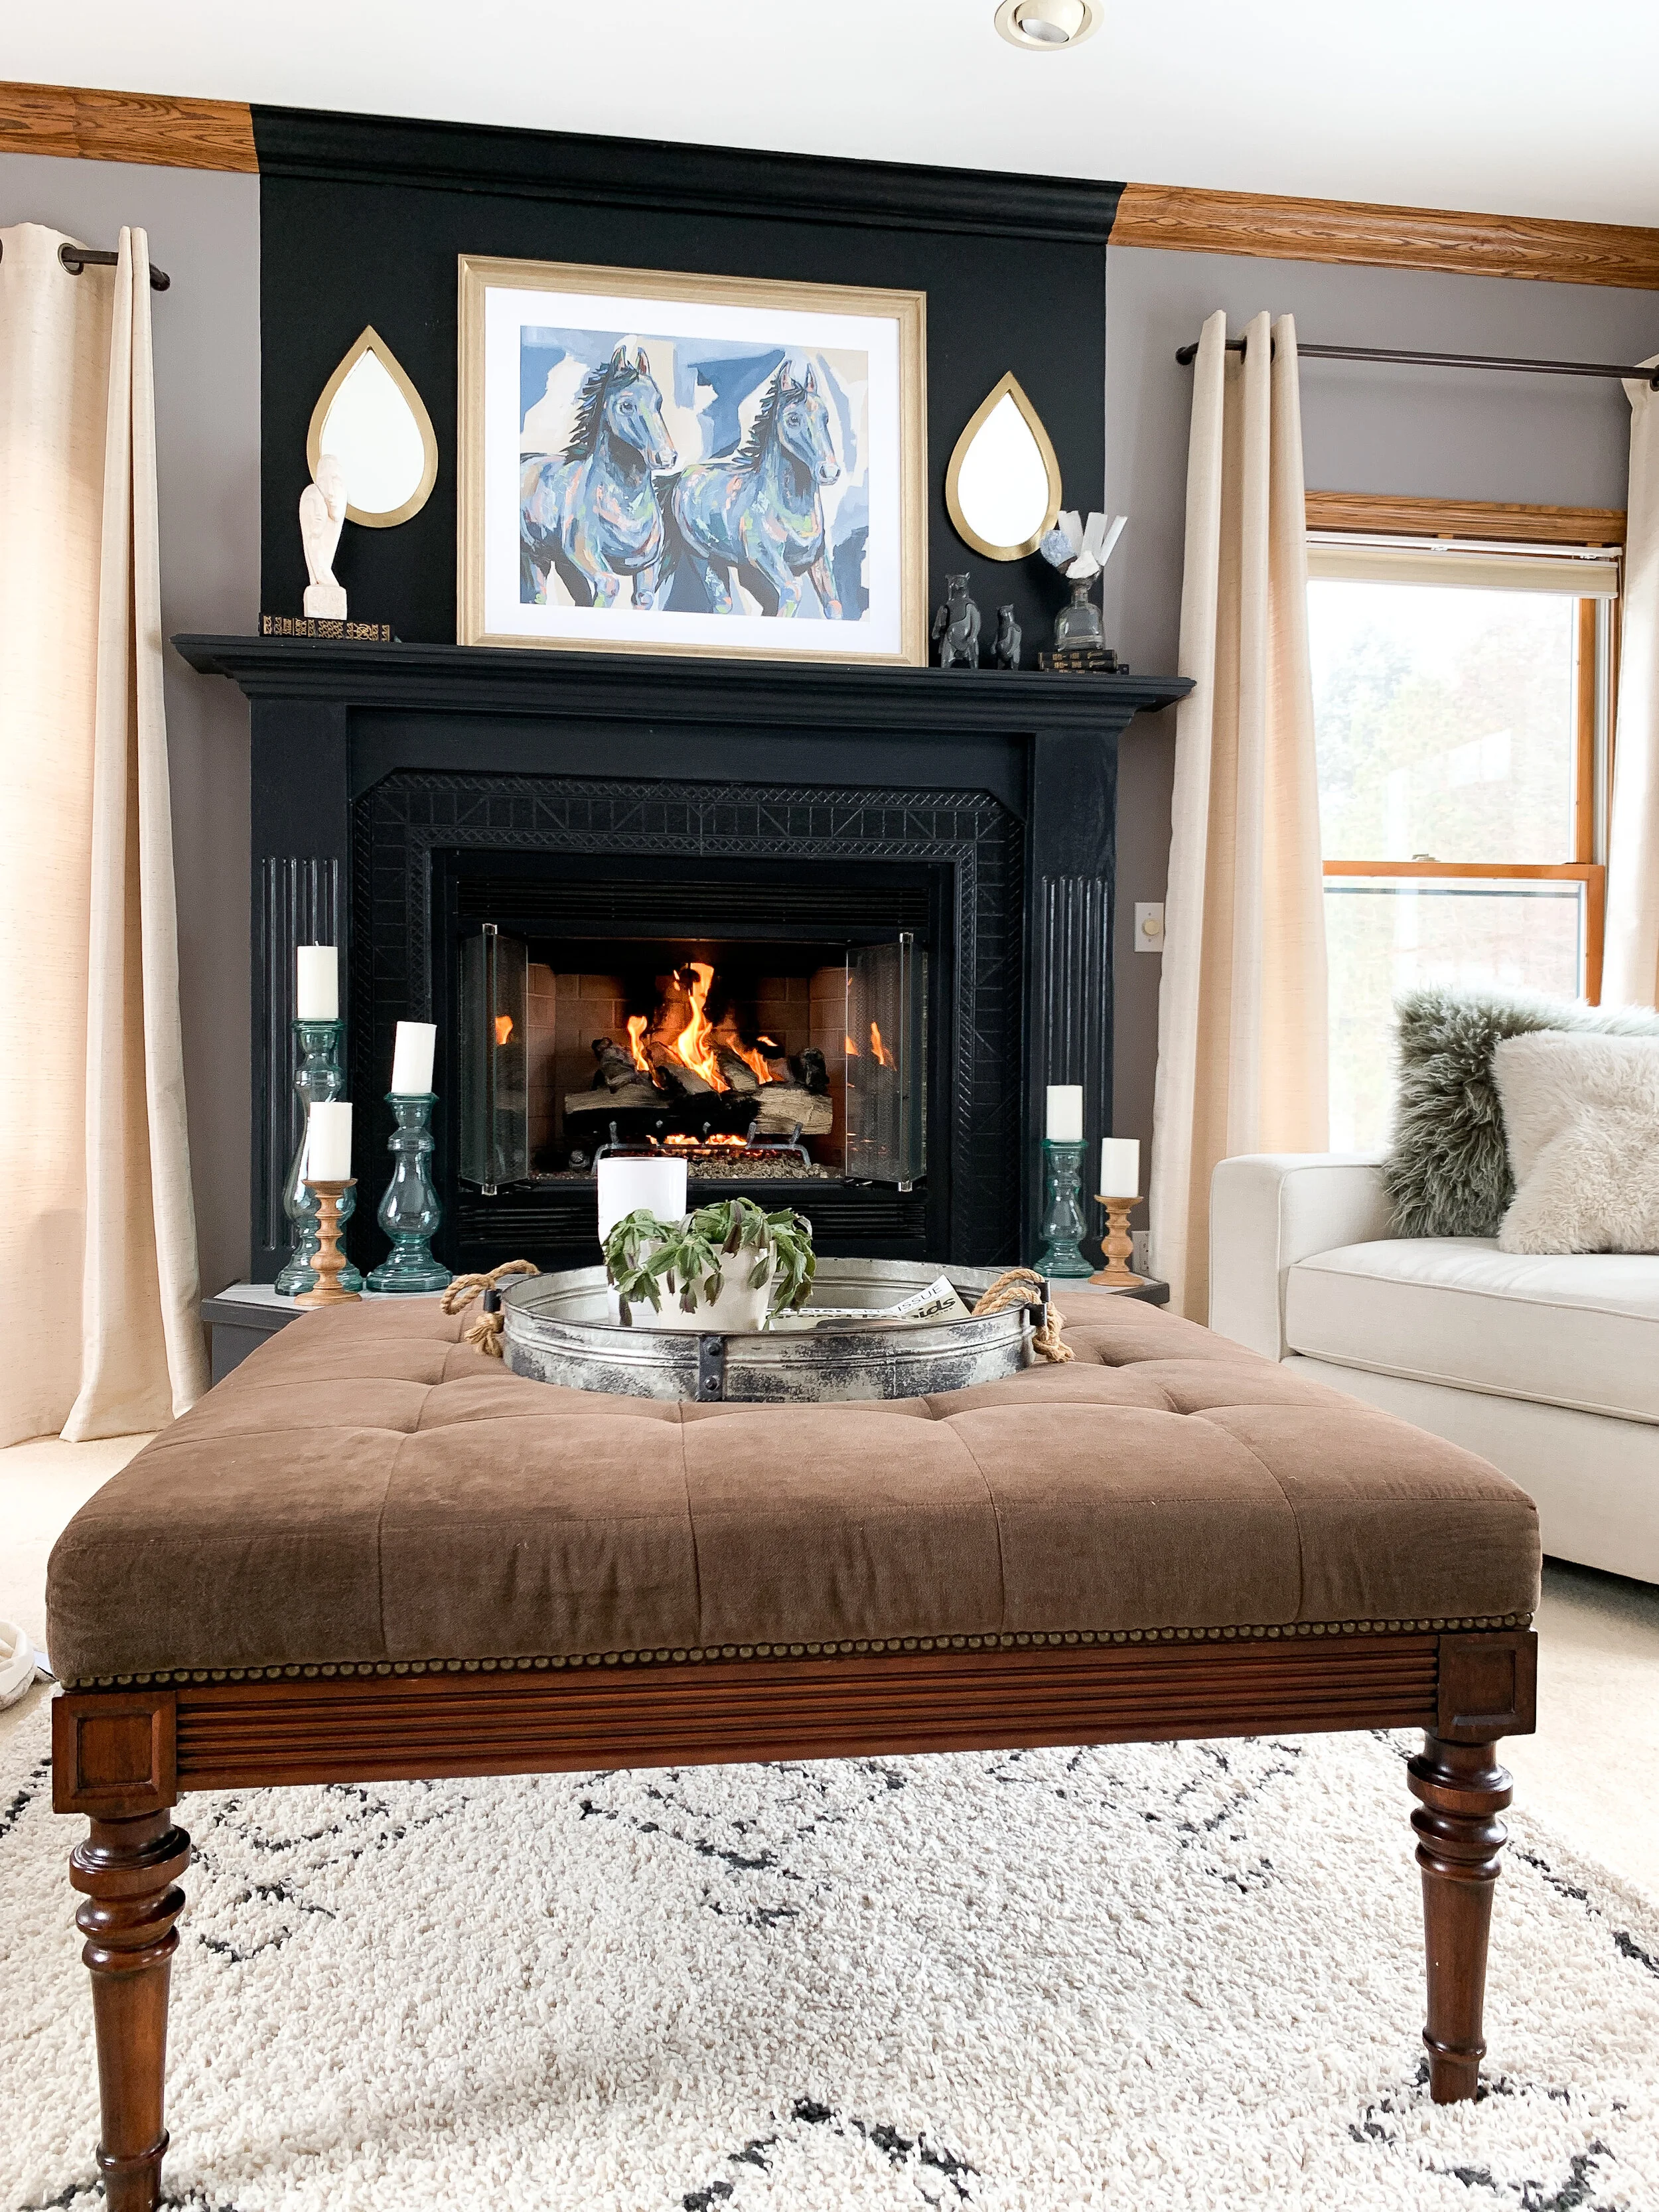
Once our walls were done, we moved in the new furniture!!!!!!!!! Already in this room were the shelves in the corner and Emily’s family’s piano :)

Here is everything that we got for her new STUNNING living room:

(4) World Market chairs $1854. Emily snagged these when they were on sale. Also, I always recommend slipcovered (washable) furniture when you have children. Linked HERE.

(1) coffee table $30. I found this table at my favorite consignment shop.

(6) strips of Ivory Coast wallpaper $349. Linked HERE

(1) Guiseley 8x10 wool rug $334 with the code CC60. Linked HERE.

Total spent on decor + furniture was $2567

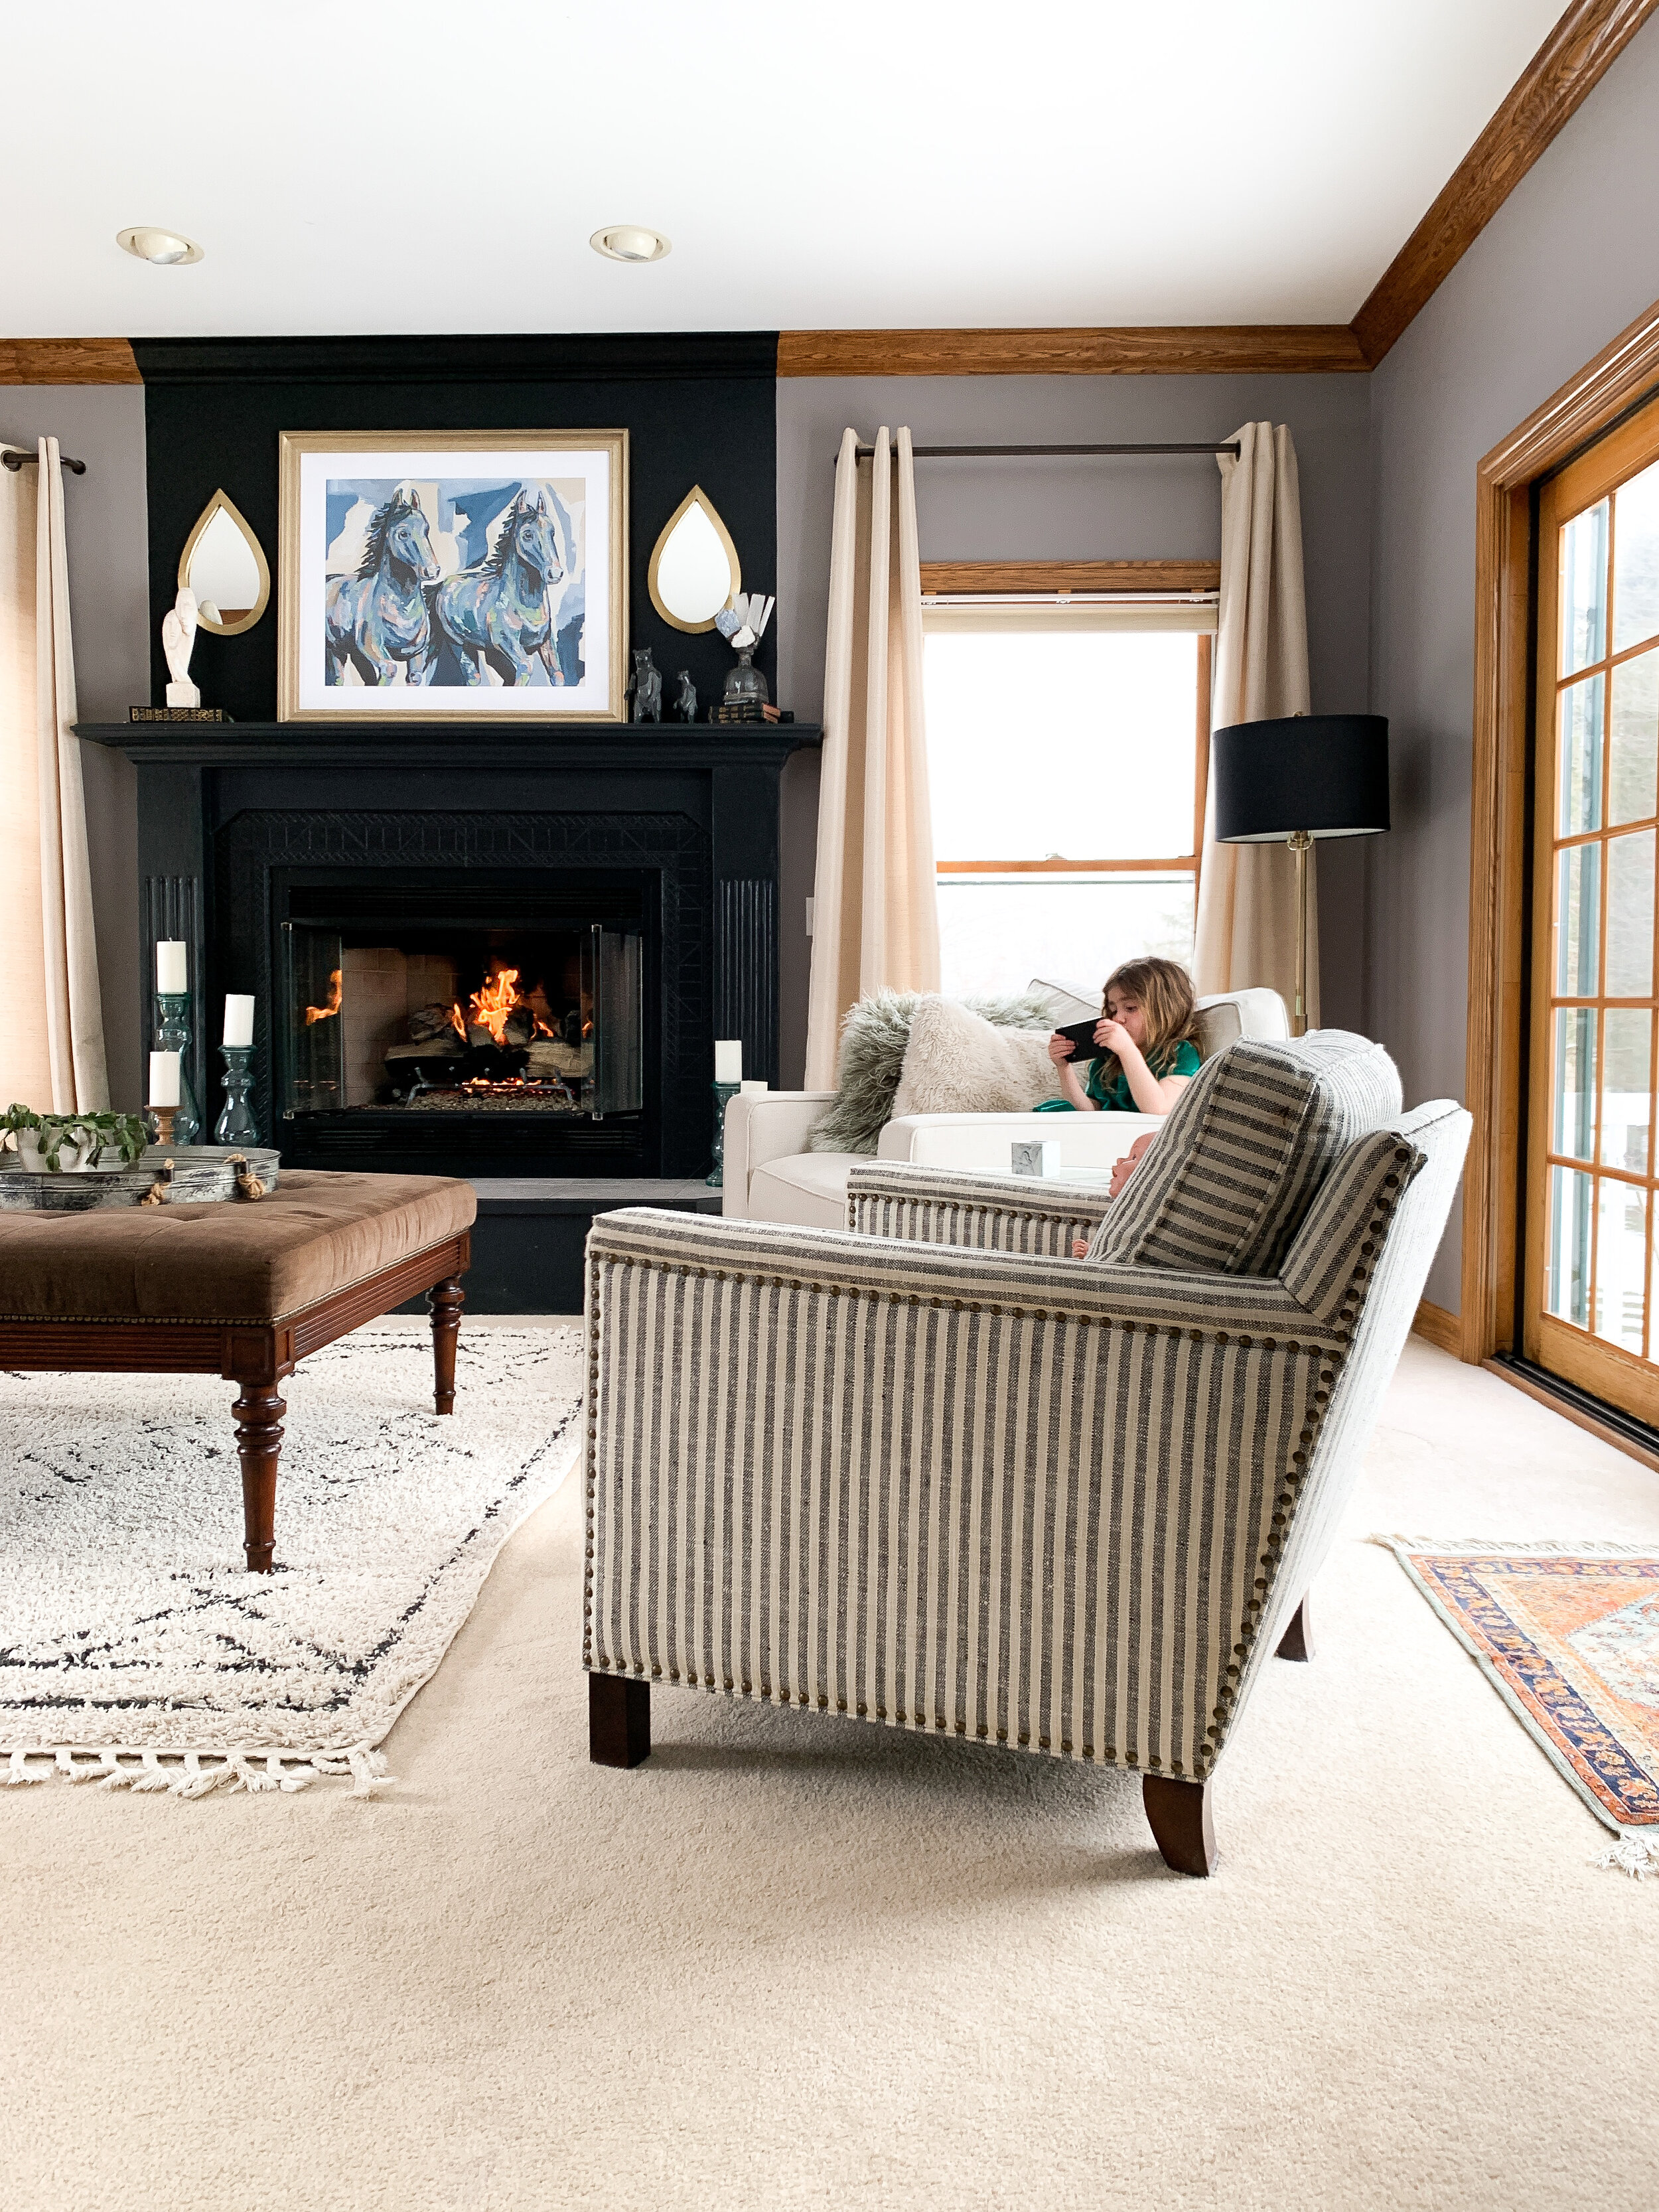
We are still on the hunt for the perfect mirror (for the wall directly across from window) and the perfect lamp :).

living room wallpaper.JPG
boutique rugs.jpg

Even though we worked on this room over the course of a month (I was busy at Copper Corners and Emily had National Guard duty + a vacay) the amount of actual time that we spent working in this room was 3 days. 

For 3 days and a total of $2770, we completely transformed this space. No demo was involved (or needed) and we used basic power tools.

So, what do you think?? Is this something you could do?? Comment below!!

I hope you loved seeing this and that it sparks some fun ideas for your space!!

Cheers!!

xo

Mary-Catheryn

Changing a 90's Oak Living Room Into a Beautiful Sitting Room With 4 Chairs and a Wallpapered Ceiling!

Here is a photo I snapped of the ‘formal living room’ the first time we walked through this house. It was just. a regular ol 90’s formal living room. Nothing special.

IMG_6429.JPG

We moved in and that formal living room instantly became a play-room for our 3 children.

If you know anything about play-rooms… you know they are usually a mess.

To top it off, this room is one of the first things you see when you walk in the front door of our home. When anyone came over, it screamed “Welcome to our home, the DISASTER zone”. Good times😂.

I was dreaming of all of the things I would do with that space the minute my children weren’t into toys anymore. And guys, that moment came last year! Our youngest is almost 6 and she is no longer into toys, but rather into hair and makeup. So we finally cleaned out that playroom and I started making it FAB.

One of the very first things that I did (while it was still a play-room) was switch out the moulding around the doorway. This made the biggest difference EVER. See for yourself!!

changing an oak living room.JPG
black doorway trim with oak trim.JPG

Now, when guests came over, we were still a mess, but at least our mess had a touch of sophistication to it.✨

ok, about the new moulding…. I looked on facebook and found a local wood worker. I had him come over, measure the space, see my sketches and inspo pictures. He measured once. Once, you guys. I was convinced that whatever he was going to build was going to be a disaster😂. But alas, he returned about a month later with this moulding completely built and in 3 pieces. He tore out the old trim and installed this one in about 30 minutes. They fit like a glove. Find yourself a local woodworker. They are gold.

Tip: When you are working with 90’s oak (trim/floors/cabinets/etc), black is a phenomenal way to give it a more contemporary-updated feel. I did that here with the black moulding.

Next up, we ripped out the carpet (and by we, I mean a professional. There are certain things I will do, and certain things I pay professionals to do. You gotta pick and choose). We installed THESE wood floors. I wanted something that matched our current floors, but let me tell ya… it is next to impossible to find an exact match. So we went with the closest thing and I love them! I did a poll on my instagram showing floors that looked semi similar and showing floors that were completely different (different stains of wood). A lot of people said go completely different. My gut said ‘stay similar"‘ and I am glad I did.

Next up paint! I did the far wall in black (Color is Tricorn Black) because of two reasons:

1- I wanted this room to flow with the moulding in the doorway.

2- I wanted to camouflage the tv.

I told my painter the color white that I wanted for the other walls. Not sure what happened, but when I got home the walls were yellow white. Not the white I had chosen. If something looks off to you, then it probably is. I went and got the correct white and we repainted🙃.

black living room.JPG

Below is the MUCH better white. I left the wood trim around the windows, as well as the wood windows. I don’t like matchy matchy, but at the same time I do like to “tie” things in. The wood flows with the floors and it brings a certain warmth and coziness to the space. So I left them as is. Remember that white is technically a cool color. So having those warm tones will make your space feel inviting and comfortable, rather than like a cold sterile psych ward. Ok, maybe cold sterile psych ward was bit far, but you catch my drift.

mixing. oak, white and black trim.JPG

Next up, I installed all new floor trim, as well as some wood details going up the walls. What does one call this? Wainscoting? Board and batten? Not really sure, because its not quite either of those things.

We have 9’ ceilings and the thin strips of wood that I got from Lowes were only available in 8’. I could have spliced each piece to add in that additional foot, but that is a pain in the butt. So instead I made sure to get a thicker floor trim and then added an additional strip above it, to give the floor trim a ‘beefier’ feel as well as make those 8’ strips fit perfectly! We already had the crown moulding, but if we didn’t, I would have added it.

Now, you may think that you could never do carpentry work, like trim and wainscoting. But you can! The key is simply having the right tools for the job. No one taught me any of this stuff. I bought the tools, tinkered around a tad and figured it out. You are smart. You got this.

Here is every tool I used to do the carprentry work in this room. These are the tools that I use for almost every project that I do. You will get your use out of them!

Saw (light weight, battery powered and one of my most favorite tools). Saw Table.

Sander (I like my wood to feel like butter, so I typically do a 600grit sand on just about everything)

Nail gun ( this is battery powered and I love it so so much)

Batteries ( I like to have two. If one dies, I can switch it out :)

Level (everyone needs great level)

After cutting your wood and nailing it in, you need to fill the nail holes :).

I use caulk in the corners and wood putty on nail holes. What I like about wood putty is that you can give it a little sand, once it dries, and it looks silky smooth✨.

IMG_5942.JPG

After:

IMG_9215.JPG

In the middle of the remodel, I decided to use this room for a quick wallpaper photoshoot! It was so pretty!!!!

You can find all of these wallpaper designs HERE.

living room wallpaper.JPG

We came up with many ideas for this space, and you all vote on them! You can see some of the wallpaper, rug and chair combos that I put together HERE. You might find something fab that inspires YOUR space!

The original chunky white wool rug wasn’t working for this room. It was too thick and it shed like crazy. You would have thought we had sheep living in our house. I switched it out for this RUG and I love it so much!! It has warm taupes, cool grays and a charcoal. The pattern is there, but also subtle enough, making it super versatile. (This is a stunning rug and I think I might still have a code for 60% off! Try ‘CC60’ at checkout😉). I wanted a patterned rug, but something that was muted enough to not distract from my upcoming wallpaper plans ;).

Next up, the chairs arrived!! I chose THESE CHAIRS for various reasons:

1- they are wide, great for bigger guys.

2- they swivel

3- the slipcovers come off and can be washed and dried! That is major when you are dealing with children ;).

4- the arms end mid seat, making it comfy for people who like to sit spread eagle (my husband)

5- I love Pottery Barn sofas and chairs.

Here are a few links to other items I considered for this room:

The Horse Artwork | The Swatch Artwork | The Mazes wallpaper | The Orange wallpaper | Wicker coffee table | Shelving I bought | Rug

four chairs in a circle.JPG

Next up: Hang curtains + pick a wallpaper (for the ceiling!)

IMG_8641.JPG

I have THESE CURTAIN RODS in every room of my house! They are available in various finishes and sizes. I love them because they wrap around, which allows you to wrap your drapes around as well. I am not a fan of drapes sticking out strangely from the wall. These hug the window :). I like to hang my rods high and wide! it gives the room height and the illusion of bigger windows.

IMG_8630.JPG

This leather ottoman wasn’t cutting it.

IMG_8637.JPG

We pulled THIS OTTOMAN from our TV ROOM and tested it out in this space. I love a beautiful blush and this sealed the deal that I wanted a wallpaper with a touch of blush in it for this room.

IMG_8356.JPG

Now, I have hung lots of wallpaper in my day, but never on a ceiling. The idea made me a tad nervous, so I called a few of my professional wallpaper hangers. All of them said they would NOT hang wallpaper on a ceiling. That is a bad sign. Even the professionals thought it was too difficult.

I was determined to finish this room with a fabulous wallpapered ceiling, so I got to work on a new idea! I spent a few weeks designing and creating a new type of wallpaper that would be for ceilings, easy to install and a one-person job.

Once I had my prototype ready, I installed it myself.

ceiling wallpaper living room.JPG

It was a dream. I only said 1 swear word, it took me only a few hours to do the entire ceiling by myself and it was everything I hoped for. I learned what tweaks I needed to make to my prototype and then perfected it for YOU!!!

Guys, a wallpapered ceiling is what dreams are made of! Find all of the wall and ceiling wallpaper options HERE.

foyer trim and wallpaper.JPG
IMG_6429.JPG

When quarantine started, I also revamped the entryway (outside area of this room). I will save that post for another day, but linked the Slow Dance wallpaper below :).

I hope I have given you some ideas and inspired something fun for your space. Remember, it is YOUR home. Make it how YOU want it :). Check out more of my blog posts HERE.

I love hearing what you think, so leave your comments below!! :)

Thank you for stopping by and for always loving and choosing my art for your home❤️. Remember to swing by the gift shop on your way out HERE.

xo

Mary-Catheryn

A few more links for you. :)

Ceiling tile wallpaper ‘Menthe + Blush’ | Entryway wallpaper ‘Slow Dance Night’ | Lamp with white shade | Drapes are Ikea | Mirror is vintage Labarge | Tv is Costco | Pink ottoman is sold out, but here is the other ottoman I love that we have |

How to update an oak fireplace + trim and LOVE it!

This house sat on the market for almost two months.

It is in a beautiful neighborhood, with large acreage properties and beautiful homes. Yet, we were only the second people to go through it and I know why….. OAK. Lots of it. Through out the entire home.

I have a feeling it scared potential buyers. Lucky for me, I love oak. Here is a little Copper Corners secret……. you do not need to paint it. You do not need to rip it out. You simply need to know how to work with it and make it cool again ;).

Let’s dive in!

Here are the two photos I took of the living room when we walked through the house.

Yes, the fireplace is hideous (in my opinion). The oak doesn’t look fab. The tile is dated and blah. But I knew that it had potential. I knew that I could make it fabulous without demo and without costing thousands of dollars!

oak fireplace

The next photo is worse. Not everyone is blessed with great taste. But that, m’dear, is fixable!!!

I feel bad writing this…. but…..this couch. Oh man. It could be cute. In the right space. But here, next to an ugly fireplace, next to an ugly side table, next to a dated lamp, next to dated drapes…..is just not right. You can take something ugly and make it pretty, by surrounding it with other pretty items. But ugly on ugly on ugly will never work. Take note. I hope the previous owners of this house are not reading this right now. Yikes!!!

IMG_6458.JPG

The first thing I did when we got the keys to the house was remove those drapes and then paint the fireplace. I bought a fire safe grill spray paint (order online, here), taped everything and sprayed the gold insert. I’m not a huge fan of spray painting stuff, but this has held up beautifully!!

IMG_7722 2.JPG
IMG_7724 2.JPG

Next I painted a coat of Kilz (order online, here) on all wood and the surround tile. Once that was dry I went over everything with black paint. Careful when choosing a black paint at the store. sometimes what looks “black” in the store will actually look blue or green once it is in your home. A black that I like is Tricorn Black by Sherwin Williams.

I painted my fireplace BLACK during a time when WHITE WAS ALL THE RAGE. Trim was getting painted white, cabinets and full kitchens white, walls white, staircases white, everything white. And then there was me…. the only person at Lowes buying black. Ha!

The reason I did that is because I know my colors and I know how they interact with each other. White wouldn’t have worked for the look I wanted here. Black has a way of making oak wood look and feel a bit more ‘contemporary’ and sleek. My friends (yes, even Instagram friends) thought I was nuts going against the ‘white’ grain, but I had to show them to make them believe ;).

IMG_3337.JPG

We have 9’ ceilings, and somehow they looked very low. Nothing in the room was giving the room height. All windows are low and at the same height. The fireplace was even lower. With a level, I drew lines on either side of the fireplace. I then brought the black paint all the way up, onto the crown molding and ended at the ceiling. THIS MADE SUCH A BIG DIFFERENCE!!!!!

Another EASY thing that makes a big difference…. hang those curtains higher, m’dear!!! Such a simple way to give any room height. Also, instead of hanging the rods right at the window lines, spread them out a tad. This will give the effect of bigger and taller windows.

oak trim with black fireplace

Our walls are Bleached Shadow by Valspar. I have this color through out my home. This color has a plum undertone that works beautifully in neutralizing the orange/yellow in oak wood. Be careful using this color with white trim, though. It may end up looking purple.

IMG_4165.JPG

Jordan found his new reading spot ;).

IMG_4185.JPG

And this past winter with my HOME ALONE painting! This painting is only available certain times the year (LINKED HERE).

Follow me on instagram (@CopperCorners) to see more!

SOFA. So many of you were shocked multiple times by this sofa today, 😂ha! First, when I turned it from an L shaped sectional into a regular sized sofa. And second, when I removed the slipcovers and washed it completely. And it looked brand new✨. I swear by Pottery Barn slipcovered furniture. Most of the covers are machine washable and look better with every wash. Find my exact sectional/sofa HERE.

Striped chair.

Mirrors on fireplace. I couldn’t find my exact ones anymore, but I did find these that had been my second choice!

Candle pillars on the fireplace. I could only find my wood pillars. The glass are sold out.

Artwork above fireplace. This is the ‘By Your Side’ paper print framed in Classic Champagne + mat.

RUGS. This is my favorite site for rugs. I always recommend getting 100% wool rugs with a medium to high pile. You can also try the ‘CC’ discount code for a % off!

Ottoman. I wish so badly that I had a link for you, but this was a hand-me-down from an aunt. It is old. Sorry!!

Ok, m’dears!! I hope I helped inspire some of your oak spaces!! If I forgot to mention something or you have a question, leave it in the comments below .

Also, if you love my posts, please save them to your Pinterest, instagram or forward them to a friend :)!

xo

Mary-Catheryn

Ps. Check out my oak KITCHEN update and office/play-tv room update